You have seen the Pinterest boards. A living room that somehow contains a full cat climbing wall, floating shelves in natural wood, a window hammock catching afternoon light, a custom sisal post that looks like it belongs in a Scandinavian design studio — and a cat draped across all of it with the specific expression of an animal who has decided this is exactly what they deserved. You saved the pin. You told yourself you would do it someday. And then you went to the pet store and spent sixty dollars on a beige carpet tower that your cat sniffed once and ignored for three consecutive years.
This is the article that gets you out of that loop. DIY cat furniture in 2025 is not the intimidating, power-tool-heavy project it used to be. The materials are accessible, the techniques are learnable in an afternoon, and the results — when you match the project to your actual skill level and your actual home — look genuinely beautiful. More importantly, your cat will use them. Because you built them to fit your cat’s specific needs, your specific space, and your specific aesthetic, rather than buying something designed to fit every cat and every home, and therefore fitting none of them perfectly.
This guide covers the foundational knowledge every first-time DIY cat furniture builder needs — the materials, the tools, the principles, and the projects — so that you start with confidence and finish with something worth keeping.
Why DIY Cat Furniture Works Better Than Store-Bought
Before the how-to, the why-to — because understanding this changes your entire approach to the project.
Making your own cat toys and accessories can bring numerous benefits to both you and your feline companion. One of the most significant advantages is cost savings. A cat tree from a major pet retailer costs between $80 and $400, depending on size and quality. The materials to build an equivalent or superior piece yourself typically cost between $30 and $80, depending on what you already have and whether you source secondhand. That price gap is real, and it compounds across every piece of furniture you build over your cat’s lifetime.
But cost is the smallest argument for DIY. The larger argument is customization. Gone are the days of ugly beige carpet towers that stick out like sore thumbs. Today’s trendy cat furniture incorporates materials like natural wood, sleek metals, and modern fabrics that blend seamlessly with contemporary homes. Using the same color palette as your existing decor works wonders.
When you build your own, you choose the wood finish that matches your floors. You choose the fabric that complements your sofa. You choose the dimensions that fit the specific wall, corner, or window where the piece will live. You build for your cat’s specific size, age, and preferences — not for the average cat that the manufacturer imagined. A senior cat with arthritis needs lower, wider, more accessible platforms. A young, energetic cat needs height and challenge. A shy cat needs enclosed hiding spaces. A social cat needs open perches at human interaction height. Cat expert Stephen Quandt advises: for senior cats, think spa and retirement home — ramps instead of jumps, padding everywhere, places to scratch, cat caves. For young kittens, think summer camp — lots of climbing, dangly toys, multiple levels, tunnels. A store-bought piece cannot make these distinctions. Your build can.
There is a third benefit that nobody talks about and that cat owners who have done this know well: cats interact more enthusiastically with objects that carry a familiar scent. Your hands. Your home’s materials. The fabric from your stash. Everything you build is permeated with the environmental scents your cat has already accepted as safe, and that initial acceptance makes adoption of the new piece dramatically faster than the same piece bought from a sterile warehouse.
The Materials That Make DIY Cat Furniture Work
Wood — The Foundation of Almost Every Build
Cats love natural textures like wood and sisal. These materials are not only durable but also provide a satisfying scratching surface. For platforms, shelves, and structural frames, three wood types cover most DIY cat furniture projects.
Plywood in three-quarter-inch thickness is the most practical material for platforms and bases. It is stable, strong enough to hold any domestic cat’s weight, cuts cleanly with basic tools, and takes paint or stain well. The DIY Plywood Floating Shelves project creates inexpensive, attractive platforms that are durable with no brackets that might trip up your cat as they move from one to the next. When buying plywood for cat furniture, choose exterior-grade rather than interior — the adhesive used in exterior plywood off-gasses less over time, which matters for an animal who will be pressing their face against it daily.
Solid pine boards — 1×6, 1×8, and 2×4 dimensional lumber — are the accessible alternative for anyone who does not have plywood-cutting tools. They are available pre-cut at any hardware store, are lightweight enough to carry and mount easily, and have a natural wood appearance that photographs beautifully and works with almost every interior style.
Natural wood branches and logs are the material that produces the most striking, unique results. If your cat loves to lounge on a branch, create an indoor landscape with a cat tree built from natural materials, including branches for climbing, platforms for relaxing, and scratching posts to keep claws in shape. Collect fallen branches of 3 to 5 inches in diameter, allow them to dry for at least two weeks, strip any loose bark, and seal with a water-based polyurethane that is non-toxic when dry. The result is a piece of cat furniture that looks like something from a high-end pet boutique and costs the price of the sealer.
Sisal Rope — The Scratching Surface Your Cat Actually Wants
Pine or other soft woods work well for scratching. Corrugated cardboard, particularly if designed as replaceable inserts, sisal rope fiber, and carpet, are all good scratching materials.
Sisal is the gold standard scratching surface in DIY cat furniture for a specific reason: its texture provides the resistance and auditory feedback that cats find most satisfying when scratching, while its natural fibers allow claws to fully engage and pull without catching or snagging. Buy natural sisal rope in either 3mm or 6mm diameter — 3mm for finer wrapping on thinner posts, 6mm for substantial posts where the rope will take heavy scratching traffic. A 50-foot coil of 6mm sisal covers approximately 31.5 inches of post height on a 2×4 frame post. Calculate your coverage before buying, and buy 20% extra for tension adjustment. Attach sisal with non-toxic craft glue, hot glue for faster application, or small staples driven from inside the wood — never visible staples on the scratch surface that your cat could catch a claw on.
Carpet Remnants and Fabric — The Comfort Layer
Carpet remnants from flooring stores are available for free or very cheaply as offcuts. Loop-pile carpet in neutral tones is the most practical choice — it provides grip on horizontal platforms, holds up well to regular cat traffic and claw contact, and is easy to cut with a sharp utility knife. Avoid cut-pile carpet with long loops that claws can catch in, and avoid carpet with rubber backing that off-gasses in warm rooms.
For enclosed sleeping areas and hammocks, any mid-weight upholstery fabric or fleece works beautifully. Fleece does not fray when cut, requires no hemming, and is machine washable — which is relevant because everything your cat sleeps in will eventually need washing. Choose fleece or canvas in the same color family as your existing furnishings, and the DIY piece will photograph as a deliberate design choice rather than a pet accommodation.
The Tools That Cover 90% of All DIY Cat Furniture Projects
You do not need a fully equipped woodworking shop. The realistic tool kit for the projects in this guide covers everything you will encounter across beginner to intermediate builds.
A cordless drill with screwdriver bits handles assembly, wall mounting, and hardware installation. A stud finder — the most important tool for any wall-mounted cat furniture — finds the structural studs behind your drywall where shelf brackets must be anchored. In order for your cat wall to be secure, you need to install cat shelving into studs, concrete, cement, or brick. Drywall alone will not be able to support the weight of your cat playing on their new jungle gym.
A circular saw or jigsaw for cutting plywood and boards handles every cut you will need for the projects below. A hand saw works for smaller boards if power tools are not available. Sandpaper in 80 and 120 grit smooths cut edges before your cat ever touches them — rough edges on a cat platform will catch fur and eventually pull skin, so sanding every cut edge is non-negotiable. A hot glue gun for attaching fabric, rope, and soft materials quickly. A level for mounting anything to a wall. That is the complete toolkit.
Project One — The Wall-Mounted Floating Shelf Set (Weekend, Beginner Level)
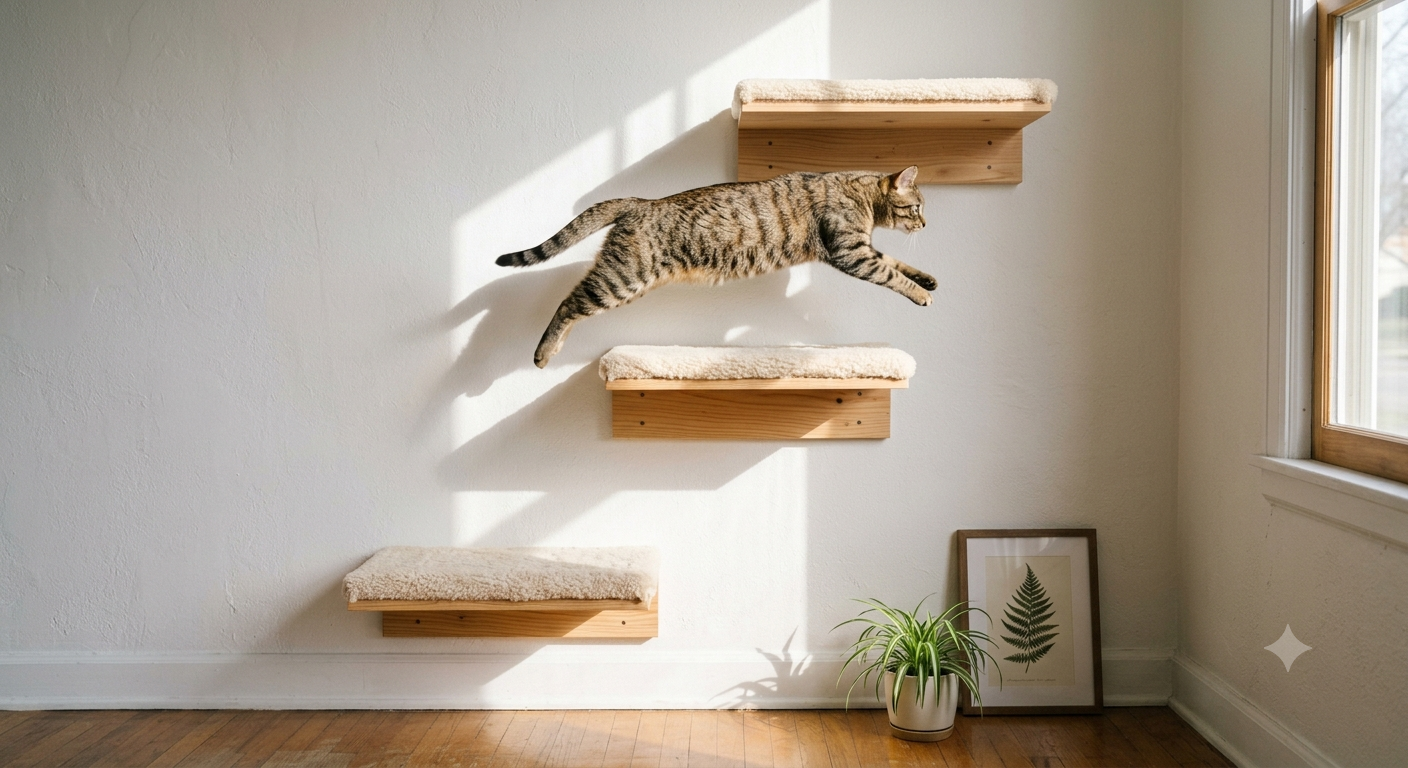
This is the project that produces the highest-impact results for the least technical investment, and it is the one that dominates Pinterest cat furniture boards for exactly that reason.
Floating cat shelves are essentially wall-mounted platforms with hidden brackets, creating a clean floating effect that looks modern. They encourage physical activity as cats jump, climb, and balance, helping them exercise while satisfying natural climbing instincts. Arrange in creative patterns — staggered climbing paths, zigzag routes, or window approaches.
Materials
Three to five 1×8 pine boards cut to your preferred shelf length — 18 to 24 inches works well for most cats. Heavy-duty shelf brackets rated for at least 50 pounds per bracket. Screws appropriate for your wall type. Carpet remnant or fleece cut to shelf size. Non-toxic craft glue. Sandpaper. Stud finder. Drill.
Build Steps
Begin by mapping your wall with the stud finder and marking every stud location with a light pencil mark. Plan your shelf layout on paper first — decide whether you want a straight horizontal run, a staggered zigzag climbing route, or a path leading toward a window. A low starting point of 12 to 14 inches off the ground ensures your cat feels safe and encourages exploration. Stagger shelves vertically between 12 and 18 inches apart so your cat can step between them comfortably — too close and there is no climbing challenge, too far and smaller or older cats cannot make the jump.
Sand all shelf edges thoroughly, then apply your carpet or fleece to the top surface using craft glue, allowing it to wrap slightly over the front edge for a finished appearance. Mount brackets directly into studs — at least one mounting point per bracket must hit a stud. If only one stud falls within your desired bracket spacing, use heavy-duty drywall anchors rated for 50 pounds minimum for the second mounting point. Level each shelf before driving the final screw. Place the lowest shelf first, then build upward, checking the stepping distance between each shelf with your own hand-span as a rough guide before moving to the next height.
The Finishing Detail That Makes It Look Professional
Some cat owners wrap parts of the shelves in jute rope to create built-in scratching areas. You can arrange these shelves in creative patterns on your wall — maybe a staggered climbing path or a symmetrical design. Wrapping the front edge of one or two shelves in sisal rope gives your cat a scratch surface on the wall-mounted system and creates a visual texture break that photographs beautifully.
Project Two — The DIY Cat Tree With Natural Branches (Weekend, Intermediate Level)
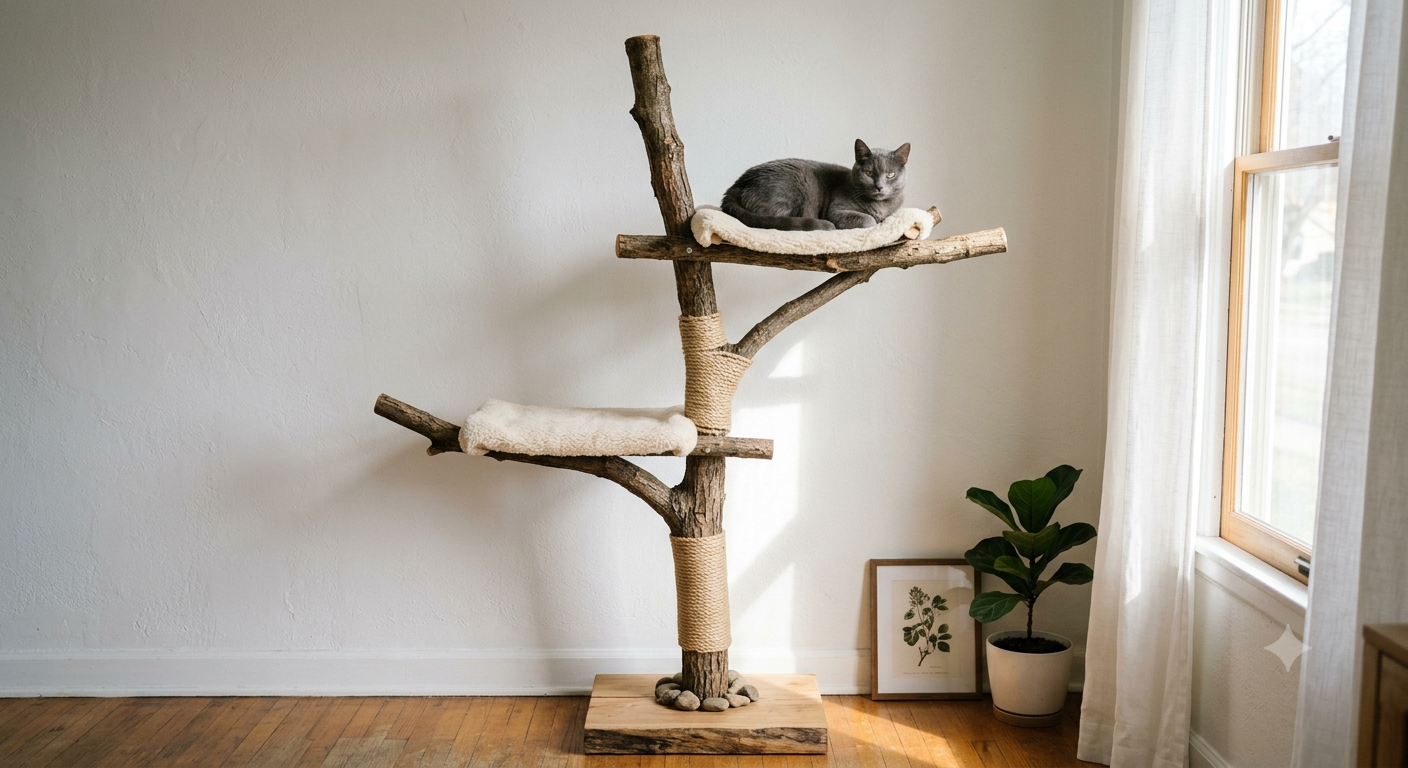
This cat tree design takes the idea literally — creating an indoor landscape with natural materials, including branches for climbing, platforms for relaxing, and scratching posts for claws.
Materials
A heavy plywood base of at least 24×24 inches in three-quarter-inch thickness. One or two natural wood branches of 3 to 4 inches in diameter and 4 to 6 feet in length. Smaller branch sections for horizontal perches. Wood screws and lag bolts. Sisal rope. Non-toxic wood sealant. Carpet or fleece for platforms. A large bucket of concrete or heavy stones for weighing the base.
Build Steps
Begin with the base — cut your plywood into two 24×24 inch squares and screw them together face to face for a 1.5-inch thick, extremely stable foundation. Fill a heavy plant pot or drill holes in the base to anchor a vertical branch section using lag bolts driven up through the base into the base of the branch. The branch needs to be dead and fully dried — at least two weeks of indoor drying before use — to prevent any mold or pest issues. Seal the entire branch surface with a water-based polyurethane.
Attach smaller branch sections horizontally at different heights using lag bolts drilled at a slight upward angle through the main vertical branch. Each horizontal branch becomes a perching platform — add a flat plywood section across the top of each one and carpet it for comfort. Wrap the main vertical trunk section with sisal rope from the base upward to create the primary scratch surface. Add a final platform at the top, large enough for your cat to lie down on comfortably.
The key stability principle: make the top at least 4 inches smaller than the base to prevent toppling. A cat tree that wobbles will never be fully adopted — cats require complete confidence in the structural integrity of anything they climb.
Project Three — The IKEA Hack Bunk Bed Cat Tower (Afternoon, Beginner Level)
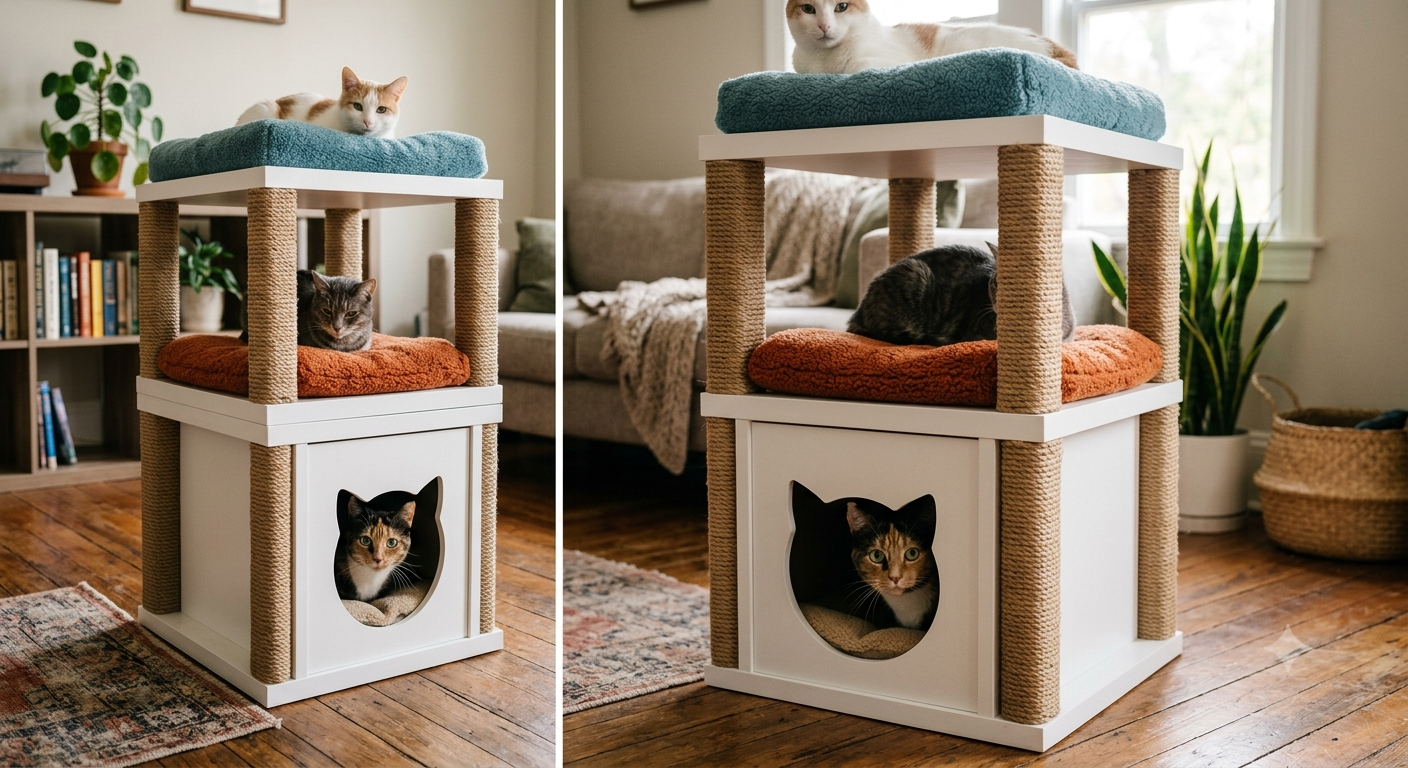
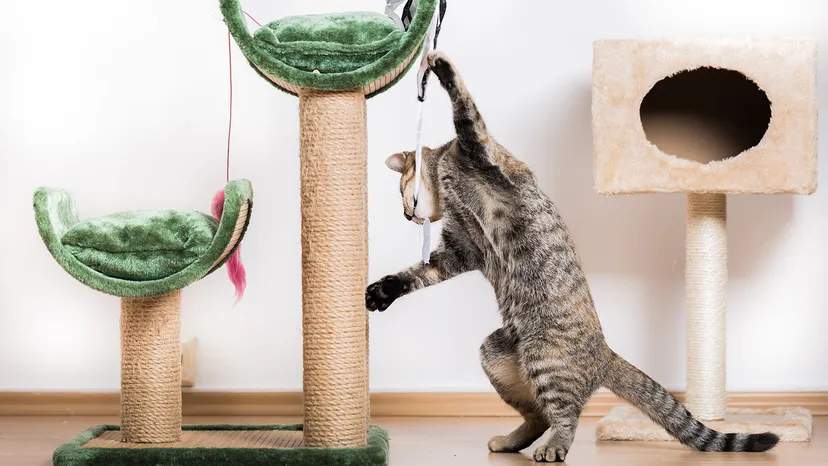
Stack a few IKEA tables together to create a multi-level cat condo. Make two or three stories by securing tables together with screws and chair braces. Wrap and glue sisal to table legs to create scratching posts.
This is the project for the person who wants maximum impact with minimum tool use. IKEA Lack side tables — available for under $15 each — become the structural units of a multi-level cat tower when stacked and secured. Purchase three tables in the same color. Place the first on the ground, place the second upside-down on top of it, securing them together through the legs with screws and metal corner braces. Place the third right-side-up on top of the second. The result is a three-level tower with the platforms at 18 inches, 36 inches, and 54 inches — ideal stepping distances for most cats.
Wrap all four legs of each table with sisal rope using hot glue and tight continuous wrapping. Add carpet remnants or fleece cushions to each platform surface. For the bottom level, cut a hole in one side panel using a jigsaw to create an enclosed cat cave that doubles as a hiding spot. The total cost, including materials, is typically under $60, and the result looks deliberately designed.
Project Four — The Window Hammock (Two Hours, Beginner Level)
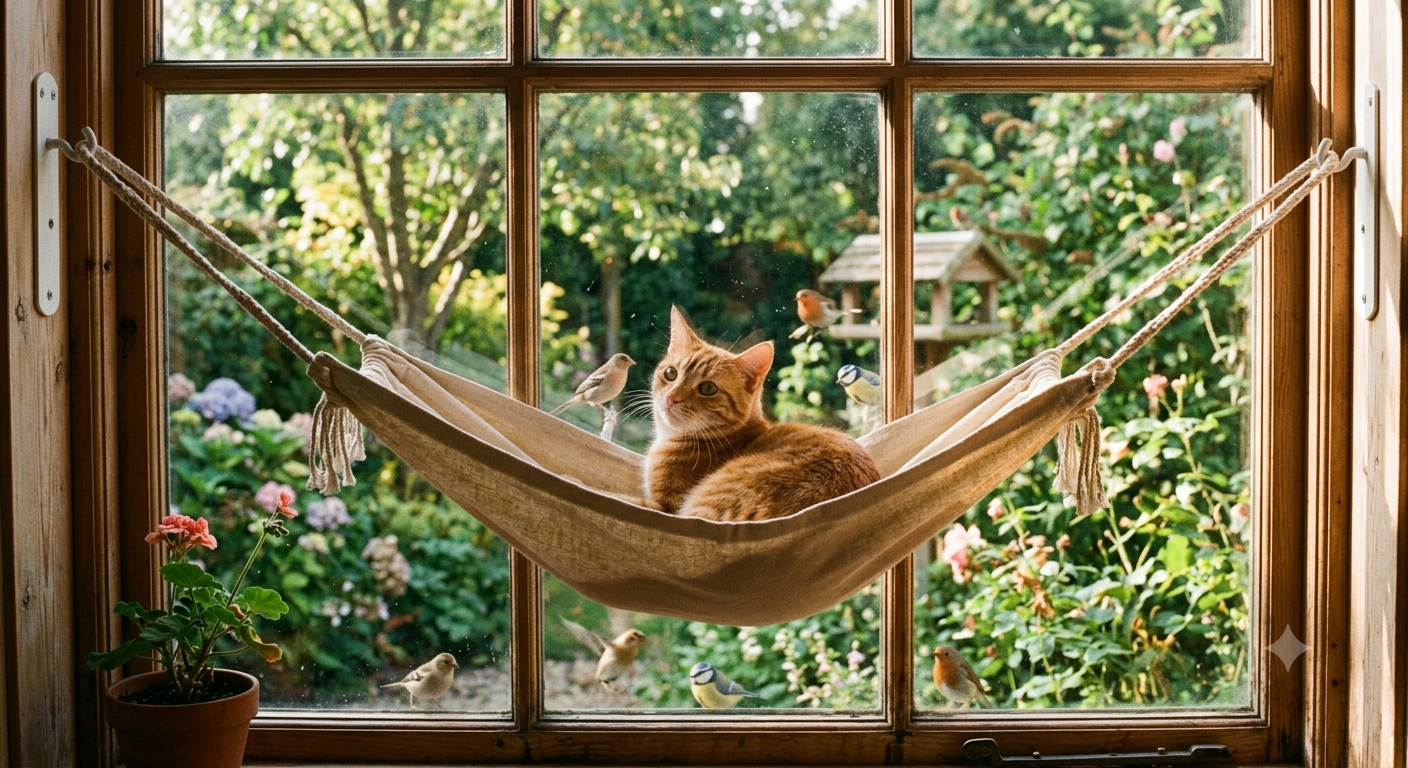
Cats are solar-powered — give them a hammock that attaches to the window. Suction cup models work great, or you can build one with brackets and breathable canvas. Perfect for cat TV — birdwatching.
Cut a piece of canvas, heavy denim, or outdoor fabric to approximately 16 x 24 inches. Fold each short edge over 2 inches and sew a hem, or use iron-on hem tape for a no-sew version. Thread a length of 6mm sisal rope or paracord through each hemmed channel and knot at both ends. Mount two shelf brackets at equal heights on either side of a window frame, angled slightly upward. Tie the rope ends to the brackets with secure knots, creating a taut hammock surface below the window sill. The hammock should sit approximately 6 to 8 inches below the window sill level — high enough for a clear outdoor view, low enough to maintain the hammock angle that keeps your cat from rolling off.
This is the simplest, cheapest, and most consistently popular cat furniture project on Pinterest, and the view it gives a cat — a front-row seat to every bird, squirrel, passerby, and weather event in their territory — is something no floor-level bed can replicate.
The Principle That Makes Every Project Work
Every DIY cat furniture project succeeds or fails based on one principle: whether it genuinely serves your cat’s behavioral needs, not just your aesthetic preferences. Start with planning — your cat’s habits and your home layout should dictate the setup. A cat wall isn’t a decor trend — it’s a feline necessity for healthy climbing and mental stimulation.
Watch your cat for one week before building anything. Where do they try to climb that they aren’t allowed? Where do they sleep most often? Do they prefer enclosed spaces or open perches? Do they scratch horizontally on the floor or vertically on door frames? Do they watch out specific windows? Every observation translates directly into a design decision. The cat who obsessively sits on top of the refrigerator needs height and a view. The cat who sleeps in your laundry basket needs an enclosed soft cave. The cat who tears apart your door frame needs a tall vertical sisal post in that exact location.
Build for the cat you have. Build in the aesthetic of the home you have. Use the materials list above, start with the easiest project that meets your cat’s most urgent need, and photograph the result — because the first time you see your cat using something you made with your own hands, you will want to remember it.