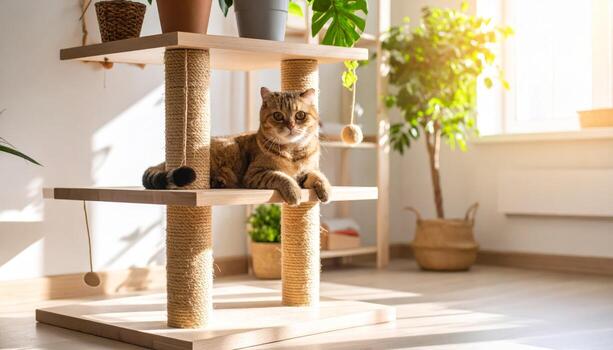
Somewhere in a pet store right now, there is a cat tree that costs $280. It has three platforms, two enclosed pods, a sisal scratching post, and a dangling feather toy. The photos on the box show a gorgeous tabby draped elegantly across the top platform, gazing thoughtfully at the middle distance.
You buy it. You bring it home. You discover that the platforms are smaller than they appeared in the photograph, the sisal is already fraying at the top before you have even finished assembly, the whole structure wobbles when a cat with any momentum jumps onto it, and the instructions are the kind that require a full read-through twice before anything begins to make sense.
Your cat investigates it once and chooses the cardboard box the cat tree came in.
A DIY cat tree sidesteps every one of these frustrations because you control every decision. The platform size. The height. The stability. The covering materials. The configuration. The specific features that your specific cat — with their specific size, preferences, and daily patterns — will actually use.
This guide gives you ten DIY cat tree designs ranging from the simplest beginner build to the elaborate dream tree that produces photographs worth putting on Pinterest. Every design includes what makes it work, what materials it requires, the critical build details, and the mistakes that undermine otherwise good builds.
What Makes a Cat Tree Different from a Cat Tower
This is genuinely worth clarifying before the builds, because the confusion produces poor results when people look at cat tree plans and try to apply cat tower principles to them.
A cat tower is primarily vertical — columns with platforms attached at different heights. A cat tree is more horizontal in its spread — it branches outward in multiple directions from a central structure, mimicking the lateral branching of a real tree. The behavioral difference: a tower provides vertical mobility along a primarily linear path; a tree provides multiple branching options at different heights that more closely replicate the multi-directional nature of tree climbing.
For cats who are active climbers and love to move between multiple positions, a cat tree’s lateral branching provides more behavioral richness than a tower’s vertical linearity. For cats who want height and a good nesting spot, a tower is simpler and more effective. The best cat furniture installations include elements of both.
The Five Materials Every DIY Cat Tree Uses
1. Structural lumber: 4×4 posts for the main trunks. 2×4 or 2×6 for platform framing. 1×6 or 1×8 for platform surfaces. Pressure-treated lumber is not appropriate for indoor use — standard construction lumber or hardwood is correct.
2. Sisal rope: The primary scratching surface material. Use 3/8-inch diameter natural sisal rope — this gauge wraps well, wears slowly, and creates the texture that cats respond to most strongly. Budget approximately 100 feet of rope per linear foot of scratching post you plan to wrap.
3. Carpet or faux fur for platforms: Cut-pile carpet provides grip for standing and walking on platforms. Faux fur or Sherpa fabric provides the softness preferred for resting platforms. Use both in the same build by covering walking platforms with carpet and resting platforms with faux fur.
4. Fastening hardware: 3-inch wood screws for primary structural connections, 1.5-inch screws for platform attachment, angle brackets for any connection that benefits from additional rigidity, and lag bolts for the most load-bearing connections. Wood glue, in addition to mechanical fastening at every joint, produces a structure that is dramatically more rigid than fastening alone.
5. Covering adhesive: Industrial hot glue for sisal rope starts and ends, and for fabric attachment to platform edges. Spray adhesive for large fabric surfaces. Staple gun for fabric attachment where it is out of the cat’s reach.
Build 1: The Three-Trunk Living Room Tree
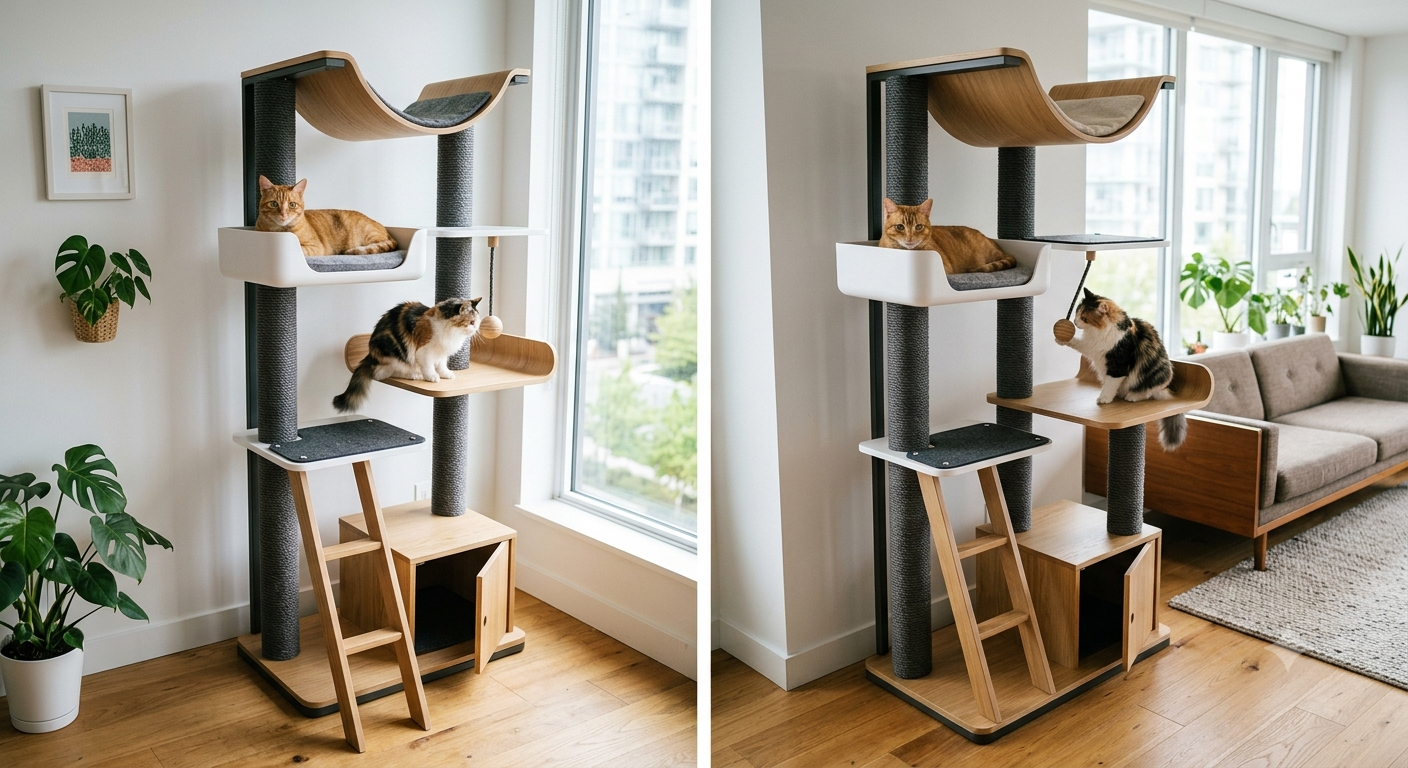
The three-trunk cat tree is the design that most closely replicates a natural tree structure — three separate vertical elements, of slightly different heights, connected by platforms and branches at multiple levels, with a wide base that provides inherent stability from the three-point foundation.
Materials:
- Three 4×4 posts: one at 48 inches, one at 36 inches, one at 60 inches (the varying heights create the organic tree appearance)
- One 24×24-inch plywood base, 3/4-inch thick
- Three platform bases, 14×14 inches, 3/4-inch plywood
- One top platform, 16×16 inches
- Approximately 300 feet of 3/8-inch sisal rope
- Faux fur fabric for all platforms
- 3-inch lag bolts for post-to-base connection
- Wood glue throughout
Build sequence:
Cut the base plywood to 24×24 inches. Mark the positions of the three posts — one at each corner of an equilateral triangle arrangement centered on the base. Drill pilot holes through the base and lag bolt each post from below. This base-to-post connection is the most structurally critical joint in the entire build — do not rely on screws alone.
Attach the platforms at heights that create comfortable jumping intervals — no more than 14 to 16 inches between platforms for standard cats, slightly more for athletic breeds. Connect platforms between posts with 2×4 bridges at 45-degree angles to create the branching appearance.
Wrap each post completely with sisal rope before attaching platforms at the post-top positions. Begin each column with a hot-glue anchor, wrap tightly without gaps, and end with another hot-glue anchor before trimming.
Cover all platform surfaces with faux fur, stapled to the underside of each platform base.
Finishing: Apply rubber furniture feet to the base corners. Stand the completed tree in its intended position and apply a gentle lateral push test — the structure should not deflect meaningfully. If it does, additional cross-bracing between the posts resolves the issue.
Build 2: The Carpet-Free Modern Cat Tree
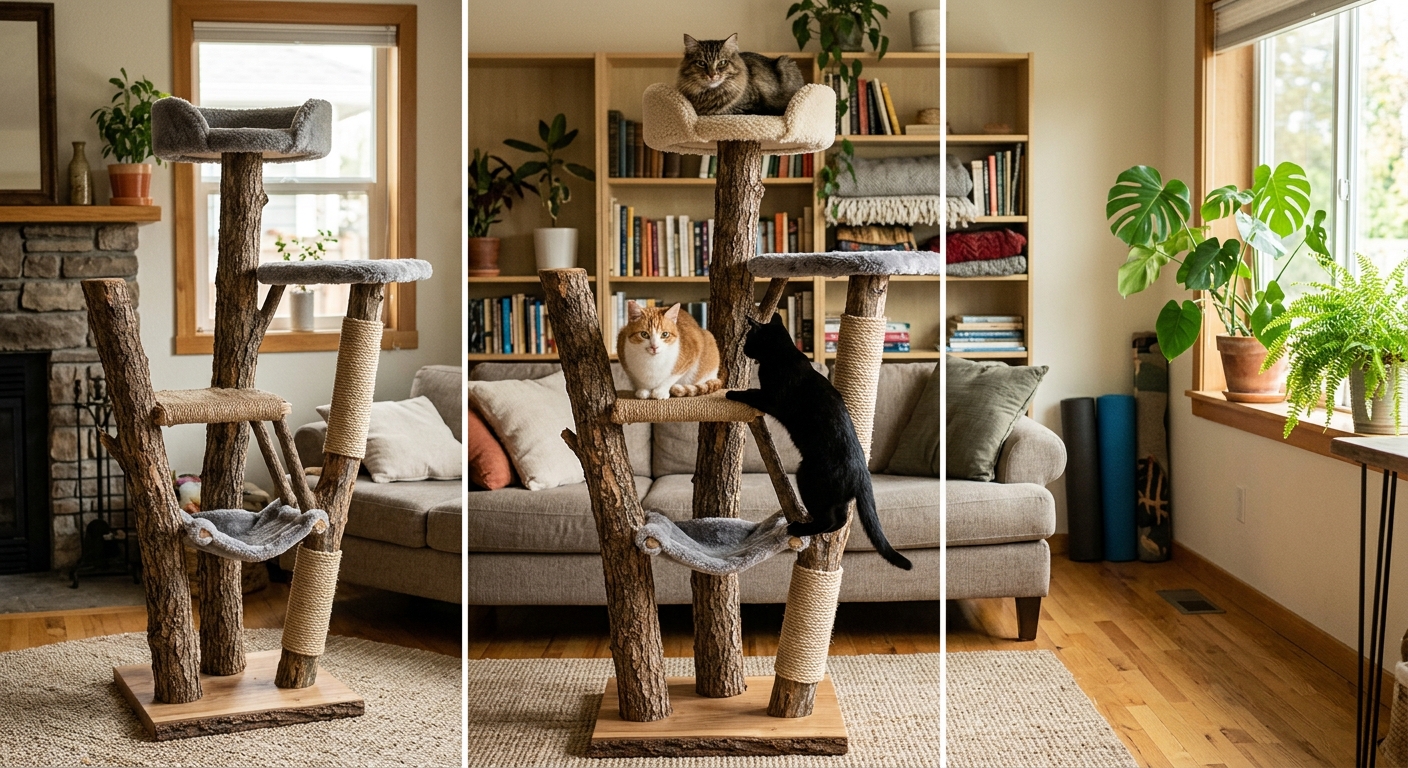
The aesthetic direction that is producing the most Pinterest saves in the cat furniture niche right now: a cat tree built without any carpet, using sisal, faux fur, and natural materials exclusively. The result is a piece of furniture that reads as intentional interior design rather than a pet accessory.
The covering system:
- Sisal fabric (not rope — sisal woven fabric that can be stapled flat like carpet) for scratching surfaces
- Sherpa fabric in a neutral tone (cream, light gray, or warm white) for all resting surfaces
- Natural wood left visible and sealed with beeswax on any non-contact surfaces
Why cats prefer this: The sisal fabric surface provides superior scratching feedback compared to commercial cat tree carpet. The Sherpa fabric provides the deep softness that cats choose preferentially for resting when given a choice. The absence of carpet loops eliminates claw-catching risk entirely.
The visual result: A cat tree that looks like it belongs in a Scandinavian interior design publication. Neutral tones. Natural textures. Clean lines. Nothing that screams “pet furniture.”
Build 3: The Under-$50 Beginner Cat Tree
This is the build for the person who wants to test the concept before committing to a full material investment. Built from a single 4×4 post, a weighted base, and three platforms, this minimal cat tree takes approximately four hours and costs between $35 and $50, depending on local lumber prices.
Materials list (approximate cost):
- One 4×4 post, 5 feet ($8)
- Plywood for base and platforms (one 2×2 sheet yields all required pieces) ($15)
- Sisal rope, 100 feet ($12)
- Faux fur fabric, 1 yard ($8)
- Screws, wood glue, and hot glue ($7)
The build:
Cut the base from plywood — 18×18 inches, 3/4 inch thick. Attach the post to the center of the base with lag bolts from below. Cut three platforms at 12×12, 12×12, and 14×14 inches. Attach platforms at 18, 36, and 48 inches from the base, alternating the offset direction so each platform extends in a different direction from the post.
Wrap the full length of the post with sisal rope. Cover the platforms with faux fur. Add rubber feet to the base corners.
This minimal build produces a cat tree that outperforms most commercial options in stability, scratching surface quality, and platform comfort — at a cost that makes experimentation genuinely low-risk.
Build 4: The Kids’ Bookshelf Conversion Cat Tree
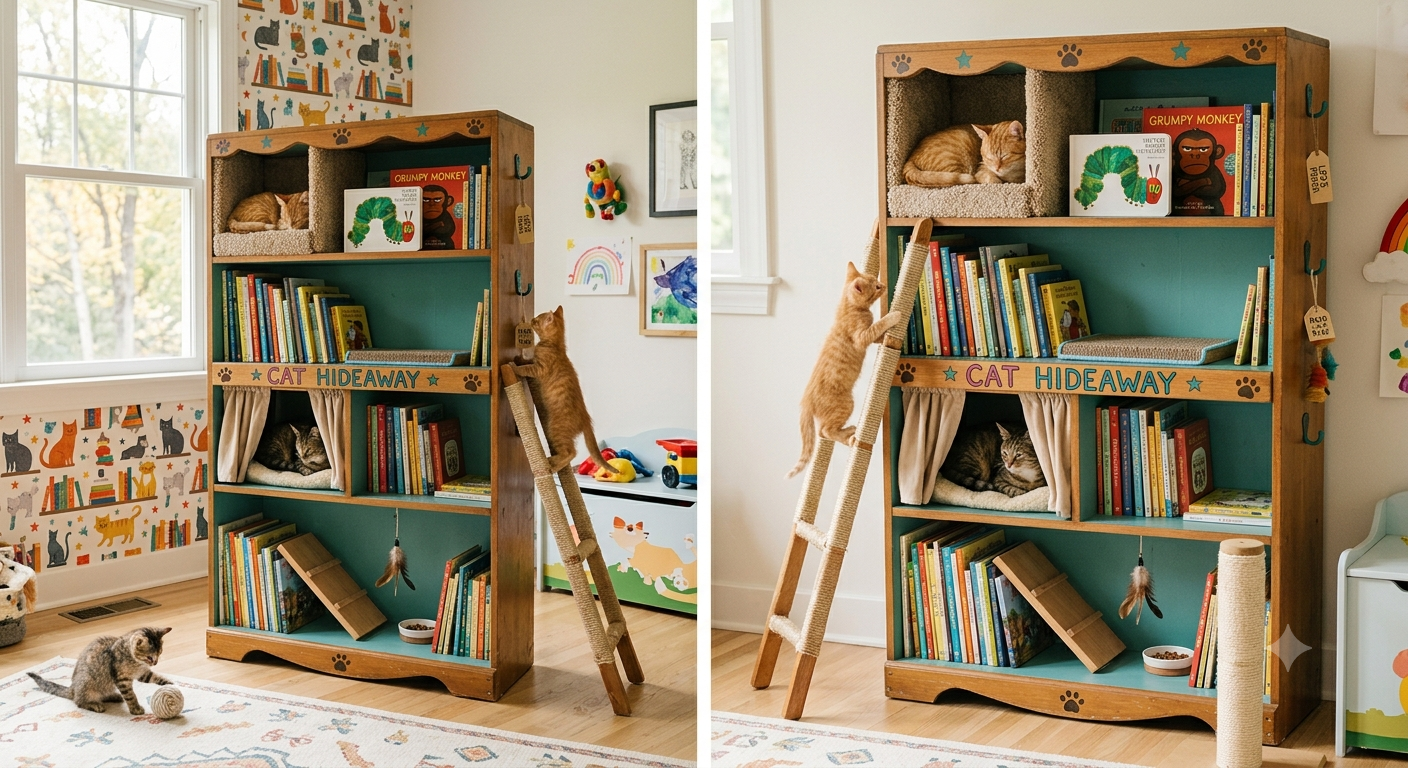
One of the most popular search results in the DIY cat tree space on Pinterest: a standard IKEA KALLAX or BILLY bookshelf repurposed as a cat tree by rotating it horizontally, adding sisal-wrapped posts, and covering the exposed shelf surfaces with faux fur.
The conversion process:
Rotate the bookshelf to its side so that it becomes a horizontal surface with the shelf dividers creating vertical barriers between compartments. Add a sisal-wrapped post to the top of the horizontal unit. Attach additional platforms above, using the existing bookshelf structure as the base.
Add faux fur mat inserts to each compartment that is designated as a cat sleeping space. Leave some compartments open for storage.
The result is a piece of furniture that looks like a media unit or storage unit from the front, revealing its cat furniture function only to someone who knows to look for it — or who notices the cat lounging across the top level.
Cost: $25 to $50 for a secondhand shelf plus the fabric and sisal additions.
Build 5: The Outdoor Cat Tree — Weather-Resistant Build
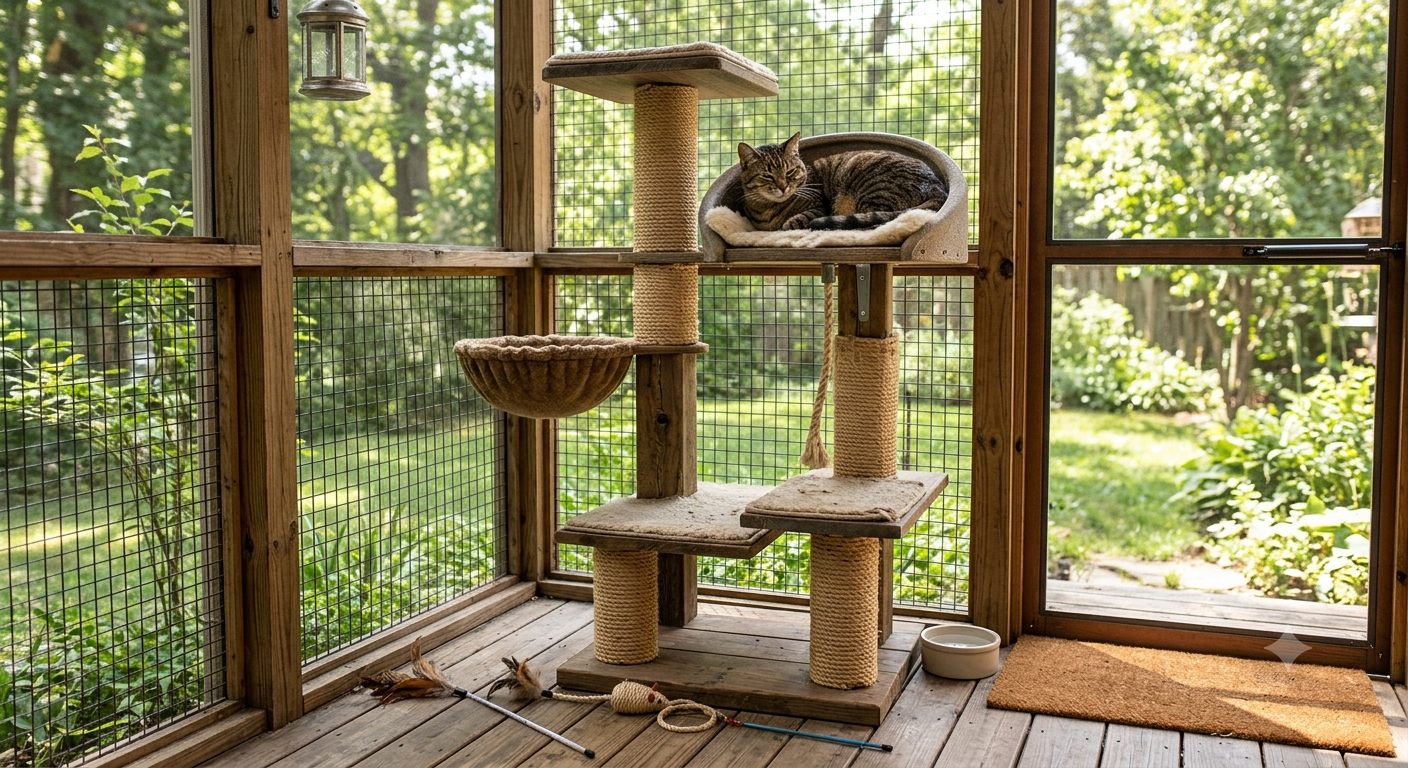
For enclosed porches, catios, or protected outdoor spaces, a weather-resistant cat tree allows the cat to enjoy outdoor enrichment with the structural and behavioral benefits of an organized climbing environment.
Weather-resistant material requirements:
- Pressure-treated lumber for any ground-contact elements or outdoor exposure
- Cedar or redwood for the posts and platforms — naturally rot-resistant
- Marine-grade sisal rope (thicker gauge, slower to absorb moisture)
- Outdoor fabric for platform surfaces — the type used for patio furniture cushions
- Stainless steel fasteners throughout (standard screws rust outdoors)
- Exterior waterproof sealant on all wood surfaces
Build consideration: Wind is the outdoor structural challenge that indoor builds do not face. An outdoor cat tree must be either heavier-based than an indoor version (to resist uplift) or anchored to the structure of the porch or catio. A 30-pound base is the minimum for a 5-foot outdoor tree in any area with wind exposure.
Build 6: The Curved PVC Cat Tree
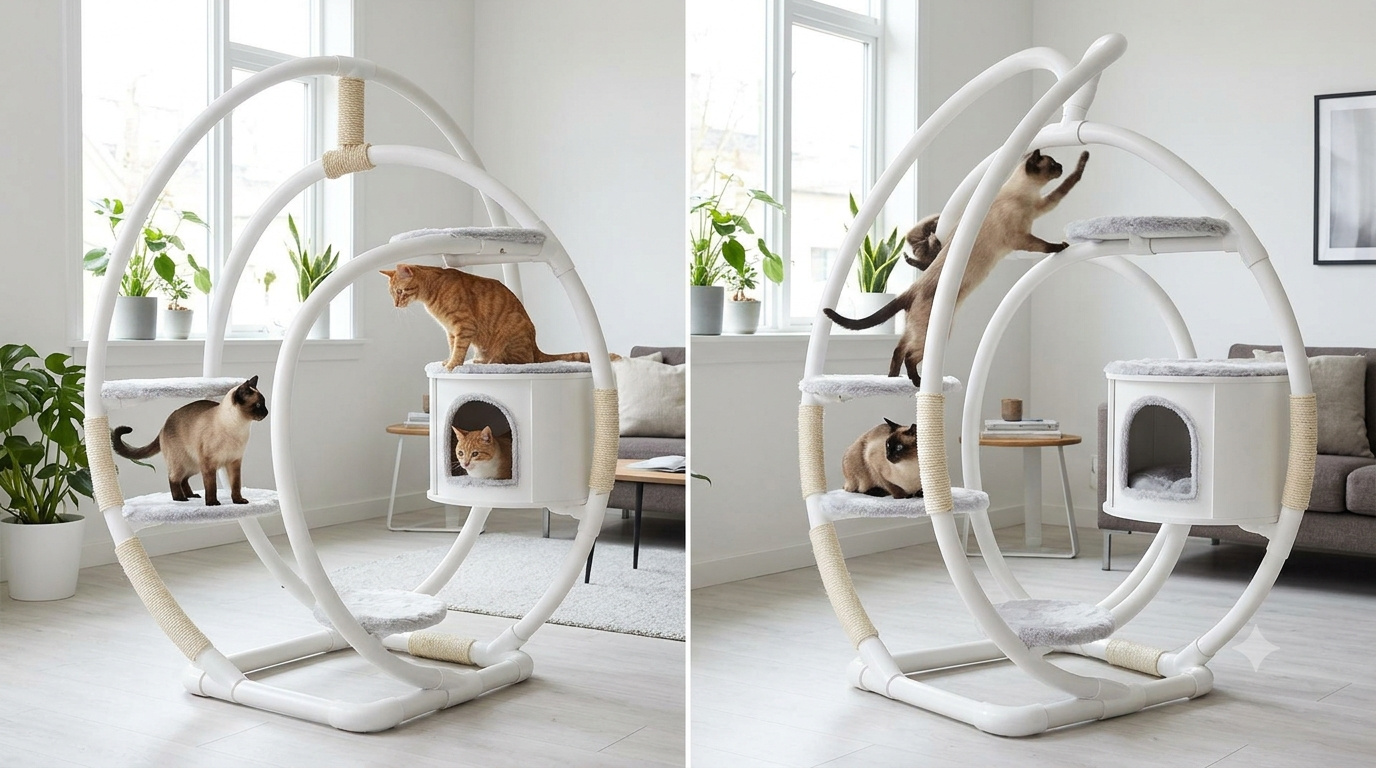
PVC pipe — particularly PVC conduit, which can be bent with a heat gun into curves — creates cat tree structures that no lumber build can replicate. Curved PVC branches radiating from a central trunk. Curved ramps between platforms. The organic, flowing forms that make the resulting structure look genuinely tree-like rather than made of lumber and rope.
The technique: PVC conduit, heated with a heat gun until pliable (approximately 250°F), can be bent to any desired curve and holds the shape permanently when cooled. Work with 1-inch conduit for branches (lighter loads) and 2-inch conduit for main structural elements (platform support and primary trunk).
Safety note: Work outdoors or with excellent ventilation when heating PVC. Do not overheat to the point of discoloration — this indicates material degradation. Wear heat-resistant gloves throughout.
Build 7: The Window Cat Tree
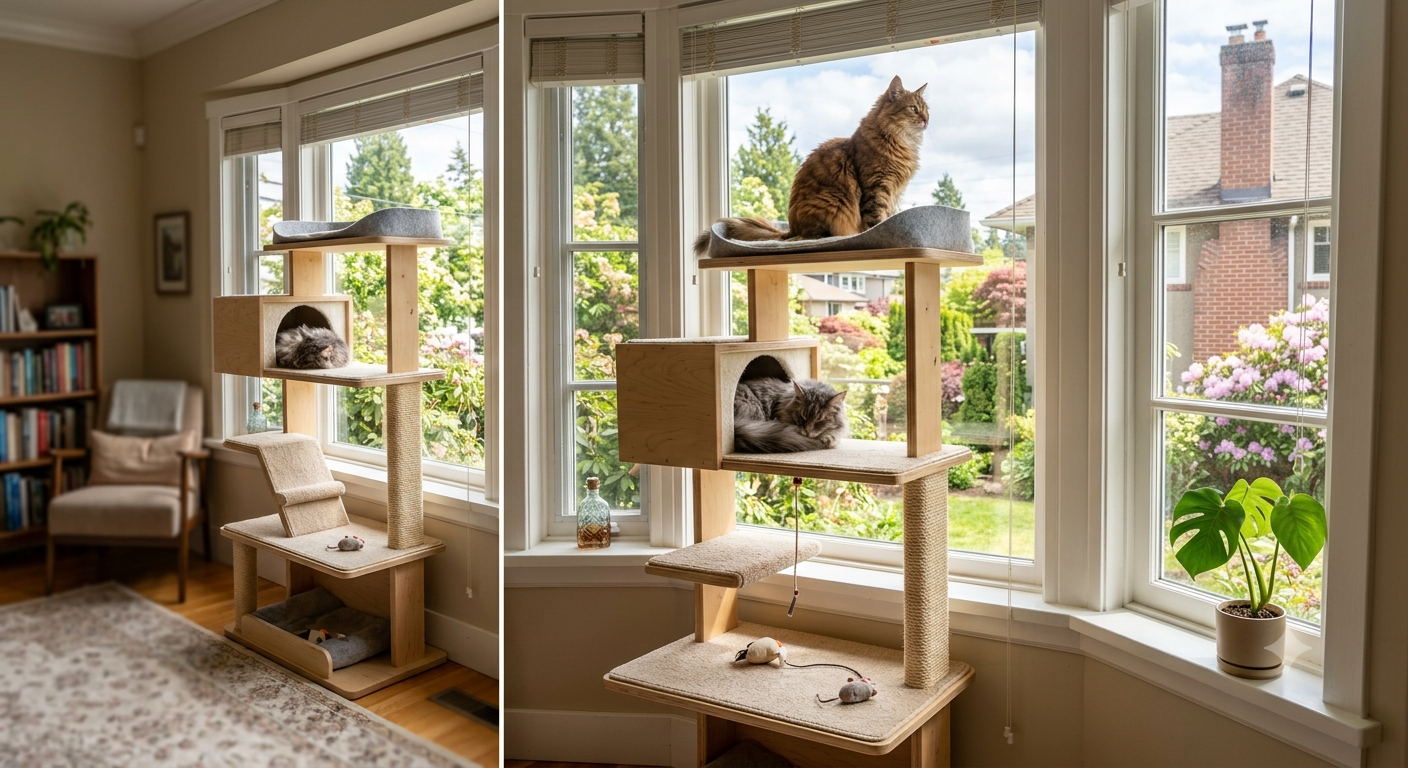
A cat tree designed around and integrated with a specific window — the most valued location in any indoor cat’s world. The window cat tree combines the vertical enrichment of a standard tree with the maximum sensory stimulation of outdoor observation.
The design: A wide base platform at windowsill height or positioned to create a direct sight line to the window. Two or three ascending platforms create height above the window. A mounting bracket system that secures the top of the tree to the wall adjacent to the window.
The key design element: the highest platform should be positioned so that a cat sitting on it can see over the windowsill to the full outdoor view available. Measure this carefully before building — the specific position relative to the window determines whether the investment produces a cat that lives on the tree or one that ignores it.
Build 8: The Repurposed Ladder Cat Tree
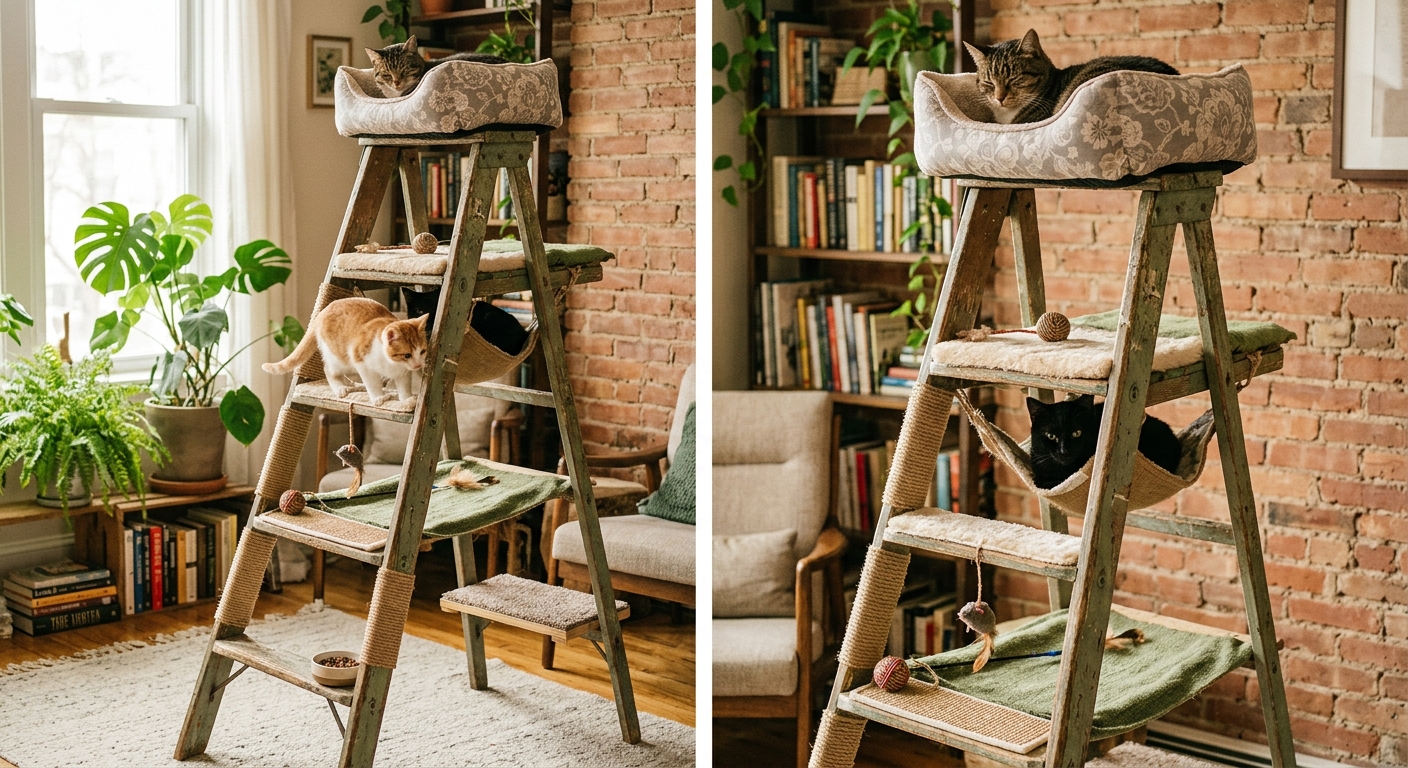
A wooden ladder — a short step ladder or a decorative leaning ladder — becomes an immediately functional cat tree with the addition of platform extensions, sisal wrapping on the rungs, and faux fur on any resting surfaces.
Wrap each ladder rung with sisal rope to provide scratching surfaces at three to four heights. Extend the rung surfaces with small plywood platforms attached to the rung tops. The ladder’s existing rigidity provides excellent stability without additional base work.
Total build time: 2 to 3 hours, not counting drying time.
Total cost: $0 to $30, depending on whether a ladder is already available.
Build 9: The Corner Cat Tree
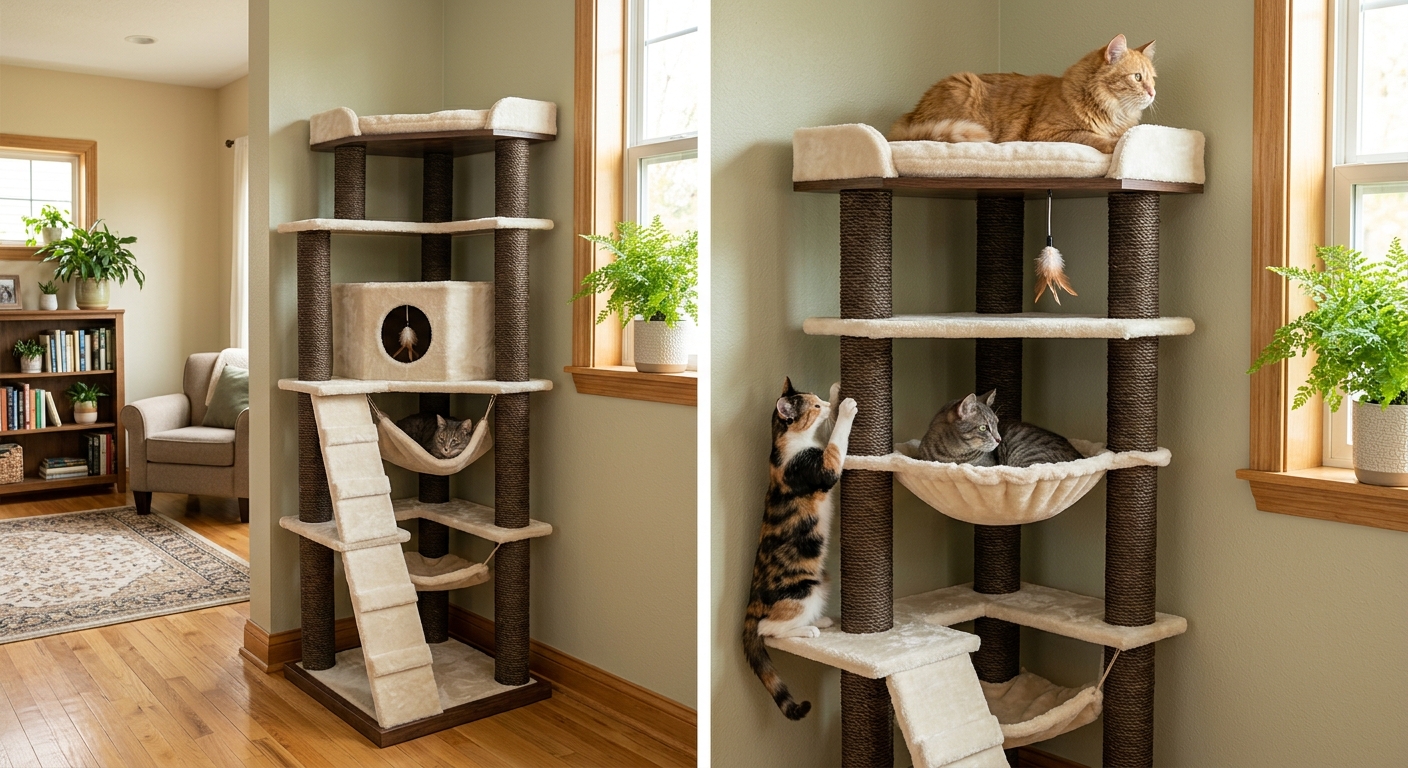
A cat tree designed to fit into a corner — using the two walls to provide structural support and eliminate the need for a wide freestanding base. The corner tree uses the existing architectural feature of the corner itself as part of the structural system.
The advantage: A corner tree can be significantly taller than a freestanding tree of equivalent material weight, because the wall contact provides lateral support that the freestanding design must achieve through base width. A 7-foot corner cat tree is entirely achievable and structurally sound with wall anchor points.
Wall attachment: Use appropriate wall anchors into studs. At a minimum, anchor at one mid-height point and one near the top. The anchors carry lateral load but not vertical load — the base still carries the primary weight.
Build 10: The Natural Wood Slab Cat Tree
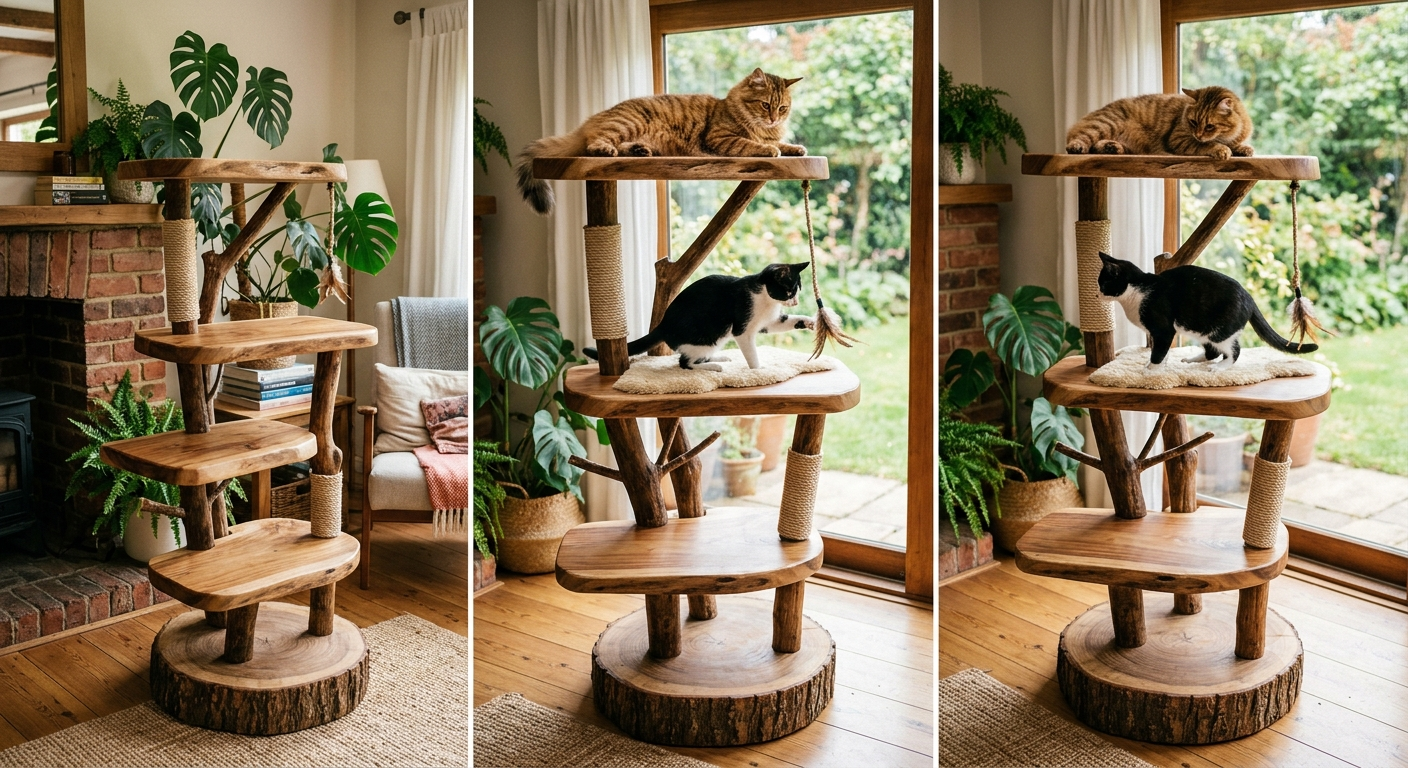
Premium hardwood slabs — the live-edge slabs available from lumber yards and wood suppliers — make the most visually extraordinary cat tree platform surfaces available. A black walnut, oak, or maple slab platform has a visual richness that no plywood-plus-fabric combination can replicate, and the natural wood surface texture is genuinely preferred by many cats for walking and grooming behavior.
The cost reality: Hardwood slabs are the most expensive material in any cat tree build — but the cost per platform is not necessarily prohibitive if smaller “off-cuts” from lumber yards are used. Many suppliers sell off-cuts at very low cost. A 16-inch off-cut of a 2-inch black walnut slab costs approximately $15 to $25 and makes a stunning primary resting platform.
The Most Important Thing Nobody Tells You
The placement matters more than the build. The most beautifully constructed cat tree in the world will not be used if it is positioned in the wrong location.
The right location is determined by three factors: your cat’s existing preference patterns (they will tell you where they want to be by where they currently spend time), the most interesting window view in your home, and the highest possible position relative to human activity in the room.
Position your cat tree in the center of these three factors, and it will be used daily, immediately, and enthusiastically regardless of whether the build is a $30 beginner project or a $200 elaborate design.
Position it in the corner you designated for it without reference to any of these factors, and you will own a beautiful dust collector. The cat knows what they want. Build them what they need and put it where it makes sense to them.
The cat tree you build this month will still be in your home years from now, structurally sound and fully used, when any commercial cat tree of equivalent or greater retail price would have been replaced twice. The investment of a weekend and $50 to $150 in materials produces something that serves your cat’s behavioral needs genuinely, completely, and durably.
Save this guide to Pinterest, start with whichever build matches your current skill level and budget, and photograph the result the first time your cat uses the highest platform. That photograph is the reward for every hour of the build.