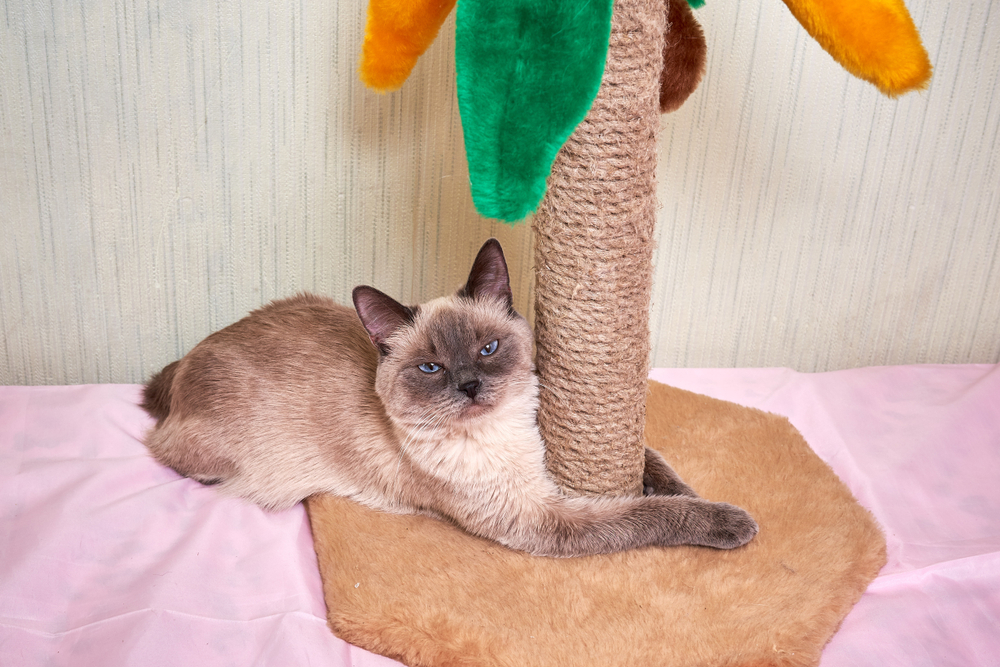
There is a specific kind of frustration that every cat owner has experienced at least once. You spend $150 on a store-bought cat tower. You assemble it with the slightly ambiguous hardware and the instruction sheet that seems to have been translated through four languages. You set it in the corner, angle it toward the window, and step back. Your cat investigates it with the polite disinterest of someone who has received a gift they did not want and is trying to be gracious about it.
Two weeks later, the tower is exactly where you left it, collecting a light layer of dust, while your cat has claimed the top shelf of your bookcase, the arm of the sofa, and the box your online order arrived in.
The problem is rarely the cat. The problem is that most commercial cat towers are built to a price point, not to a cat’s actual behavioral needs. They are too wobbly when a larger cat jumps on them. The platforms are too small. The carpet covering deteriorates within months and looks like it was used to clean an engine. And they are designed to appeal to the human standing in the pet store aisle, not the cat who will be expected to use them.
A homemade cat tower built with intention solves every one of these problems simultaneously. It is sturdier because you can overbuild it without a manufacturer worrying about material costs. It is larger because you are not constrained by what fits in a box. It covers better because you choose the materials. And it is positioned, sized, and configured specifically for your cat’s preferences rather than the average consumer’s aesthetic sensibilities.
This guide covers eight DIY cat tower designs across a full skill range — from the genuinely beginner-accessible to the elaborate structural builds that produce the kind of cat architecture that gets photographed and pinned. Every design includes materials, the key build considerations, and the specific mistakes worth avoiding.
Why Your Cat Needs a Tower — The Behavioral Case
Before the builds — the understanding that makes the tower work. A cat tower is not a gift or an indulgence. It is behavioral infrastructure that meets needs that a flat domestic environment cannot.
Cats are naturally inclined to seek high vantage points for safety, for observation, and for the social signaling that comes with elevation. In multi-cat households, the cat who occupies the highest perch is making a social statement without any physical confrontation. In single-cat households, a high vantage point reduces the low-level anxiety that comes from being unable to survey the environment — from not knowing what is behind the corner, coming through the front door, or moving in the adjacent room.
A well-placed cat tower positioned near the most active window in the home gives a cat their equivalent of a surveillance office, a comfortable workstation, a napping suite, and a scratching station all in one. The cat who uses their tower consistently is the cat whose behavioral needs are being met — and whose impact on your furniture reflects that adequacy.
The factors that determine whether a cat uses their tower: stability (a wobbling tower trains the cat to avoid it), appropriate height (cats prefer to be at or above human eye level when resting), surface texture (cats return to surfaces that feel good under their paws), proximity to interesting views, and the presence of scratching surfaces that allow the tower to function as a territory-marking post as well as a perch.
Build with all five of these factors in mind, and your homemade tower will be sturdy. Miss any of them, and you reproduce the dusty-corner problem with a homemade version.
The Core Build Principles That Apply to Every Design
Stability above everything. The single most important structural quality of any cat tower is that it does not wobble. A cat that experiences tower wobble when jumping onto it will not jump onto it again — the conditioned avoidance develops within the first two or three experiences and is extremely persistent. Overbuild the base. Use a base dimension that is at least 50% of the tower’s total height. Anchor wall-adjacent towers to a stud. Do not compromise on this point for any reason.
The materials that matter. The primary structural material for most DIY cat towers is PVC pipe, lumber (4×4 or 2×4, depending on the design), or a combination. The covering material is where the most difference is made relative to commercial towers: sisal rope or sisal fabric for scratching surfaces, faux fur or Sherpa fabric for resting platforms, and carpet only for sections where the cat will walk rather than scratch (cats use horizontal carpet differently from vertical sisal).
Platform sizing. A platform where a cat cannot fully stretch out is a platform that will be used briefly and abandoned. The minimum comfortable platform size for a standard domestic cat is 12 inches by 12 inches. For larger breeds — Maine Coons, Ragdolls, Norwegian Forest Cats — 14 by 14 inches minimum. Any platform intended as a primary sleeping spot should be at least 16 by 16 inches.
Height strategy. A tower with only one height level works for one cat and provides one type of benefit. A tower with multiple levels — ideally at three or more distinct heights — allows for activity (lower platforms) and rest (higher platforms), accommodates multiple cats with different social hierarchies, and provides the vertical travel behavior that cats find genuinely enriching.
Build 1: The PVC Pipe Beginner Tower
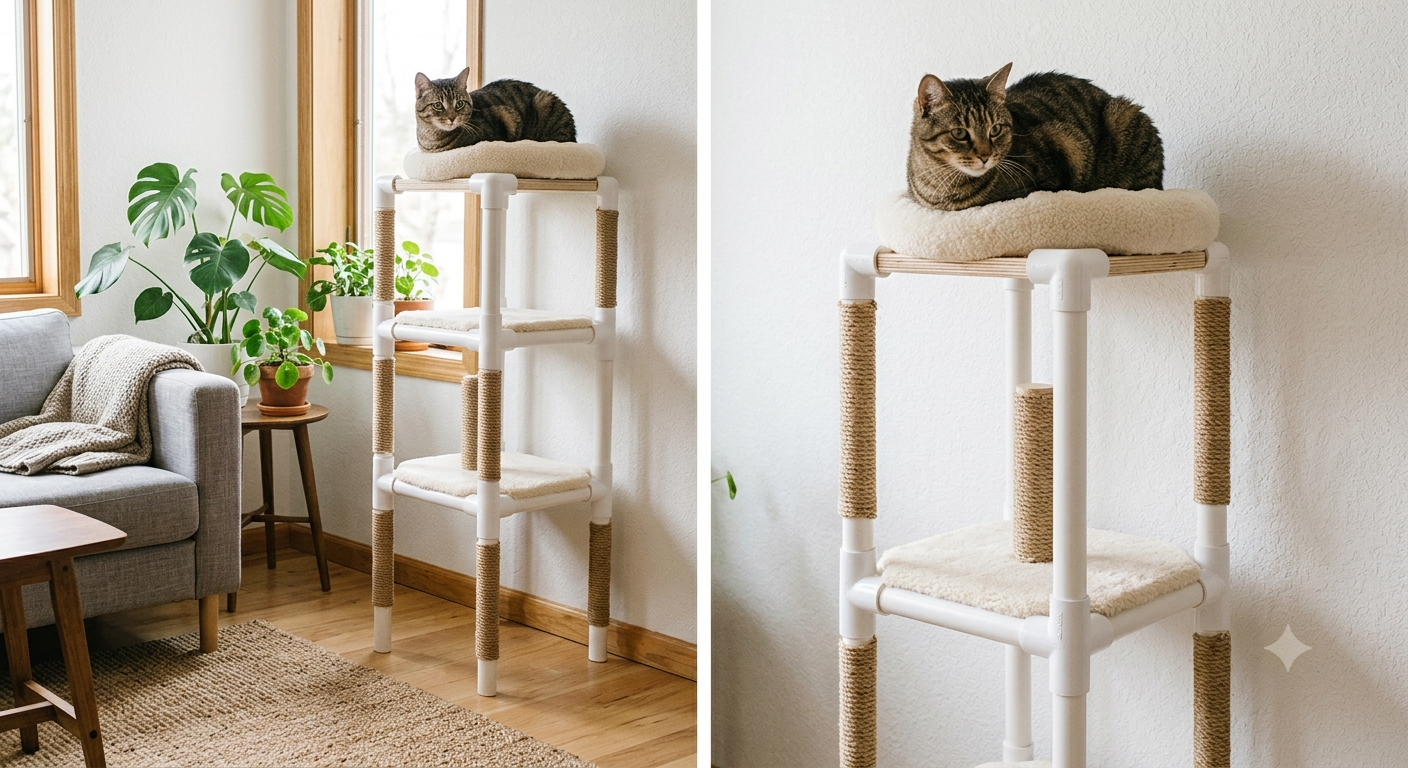
Why it works: PVC pipe provides a stable, clean, and surprisingly elegant structural system that requires no woodworking skill, no specialized tools beyond a hacksaw and pipe cutter, and no experience with construction. The resulting tower is stable, completely customizable in height and configuration, and — when covered with appropriate materials — a genuinely excellent cat perch.
Materials:
- 3-inch PVC pipe, approximately 12 feet total (cut to your desired heights)
- 3-inch PVC T-joints and elbow joints for the platform mounts
- Plywood cut to platform dimensions (12×12 minimum per platform)
- Sisal rope — approximately 200 feet for a 4-foot tower
- Faux fur or Sherpa fabric for platform surfaces
- PVC cement and primer
- Non-slip rubber feet for the base
The build process:
Begin by planning your configuration on paper — decide the number of levels, the heights between them, and the total height. Cut the PVC pipe to the appropriate lengths using a pipe cutter. Dry-fit the entire structure before cementing to verify stability and configuration.
Once the configuration is confirmed, cement the joints beginning from the base and working upward. Allow full cure time — typically 24 hours — before loading the structure.
Attach the plywood platforms to the PVC structure using bolts through pre-drilled holes in the pipe and platform. Wrap the vertical PVC sections with sisal rope secured with hot glue at the start and end of each column — wrapping tightly and consistently is the key to a scratching surface that lasts.
Cover the platforms with faux fur or Sherpa, stapled or glued to the underside. Add rubber feet to the base pipes.
The result: A tower that is cleaner-looking than most commercial options, completely stable, and built to any height configuration your space allows.
Build 2: The Floor-to-Ceiling Tension Tower
Why it works: The floor-to-ceiling tension tower solves the stability problem definitively — it does not need a wide base because it is anchored to the ceiling. This design is particularly valuable in small spaces where a wide base would consume significant floor area, and it produces the most stable cat climbing structure available without wall anchoring.
The mechanism: Two threaded steel rods or wooden poles extend from a ceiling plate (padded to protect the ceiling surface) to a floor plate, held in compression by tension adjustment mechanisms. Platforms are attached to the vertical elements at desired heights.
Materials:
- 2 wooden poles, 1.5 inches in diameter, cut to ceiling height minus 2 inches
- Adjustable tension feet at the top and bottom of each pole
- Plywood platforms
- Sisal rope and platform covering fabric
- Drilling equipment for platform attachment
Build consideration: The ceiling where the tension mechanism bears against must be solid — drywall without a stud will not sustain the compression force without damage. Use a stud finder to locate the ceiling structure before positioning the tower.
Best for: Small apartments where floor space is limited. Multi-cat households where maximum height at minimum footprint is the goal. Renters who cannot anchor anything to walls.
Build 3: The Lumber A-Frame Cat Tower
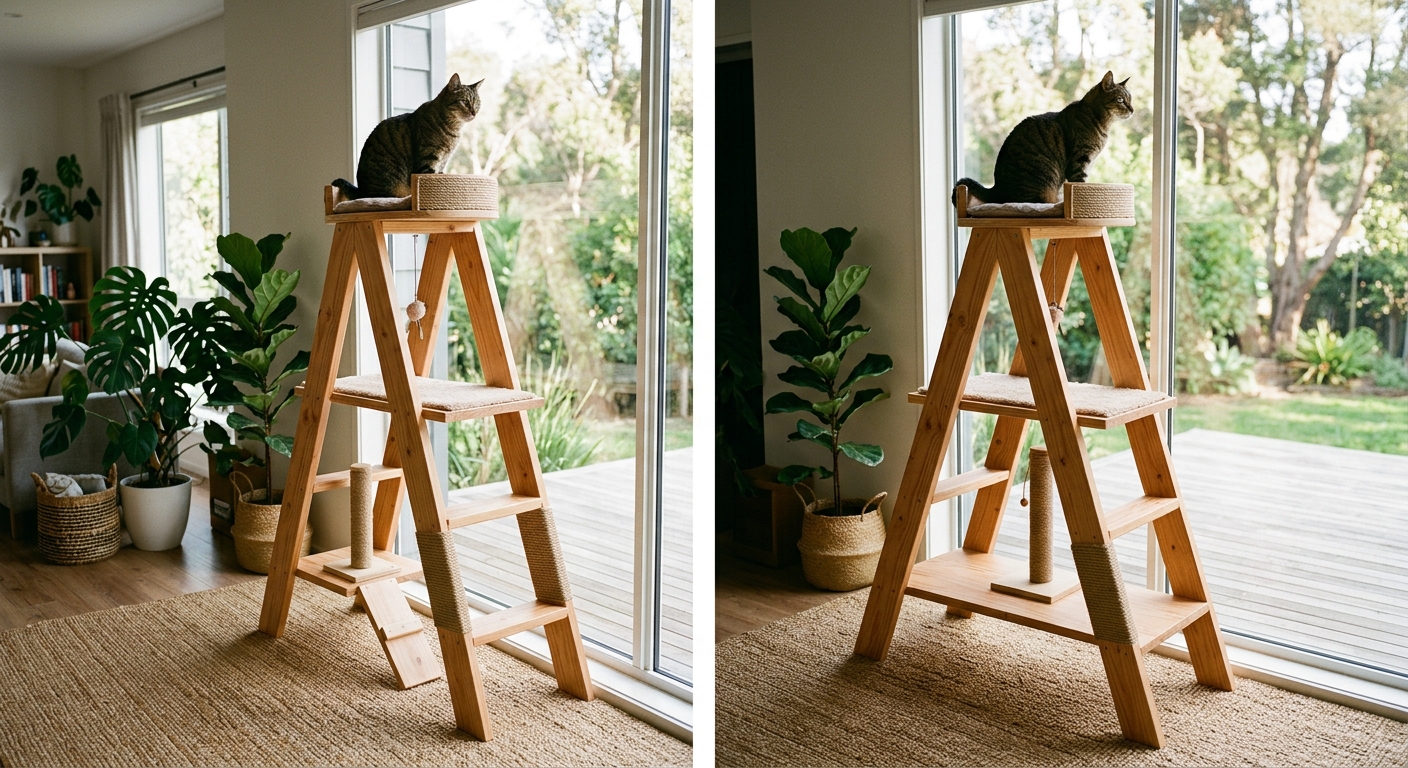
Why it works: The A-frame design — two angled legs meeting at the top, with platforms attached between them — produces the most visually dramatic cat tower available and the most structurally stable large-format design. The wide-angled base distributes weight effectively, and the symmetrical structure is inherently rigid.
Materials:
- 4×4 lumber for the angled legs (length depends on desired height — typically 6 to 8 feet for a 4-foot finished height)
- 2×6 lumber for platform bases
- Plywood for platform surfaces
- Sisal rope for the entire leg surface
- Carpet or fabric for platforms
- 3-inch exterior screws and angle brackets
- Heavy furniture feet for the base
The build: Angle-cut the base of each leg to sit flat on the floor at the desired angle (typically 15 to 20 degrees from vertical). Connect the two legs at the top with a platform base and at two or three intermediate heights. The angle of the legs provides inherent lateral stability without any separate base structure.
Cover the leg surfaces completely with sisal rope — at this scale, you will need approximately 400 feet of rope for full coverage of a 6-foot design. The rope winding on a 4×4 lumber base creates an exceptionally durable scratching surface that outlasts any commercial sisal equivalent.
Build 4: The Bookshelf Tower — Built Into Your Home
Why it works: This is not a freestanding tower — it is a bookshelf that has been repurposed or designed from the beginning to include cat access, cat platforms at strategic heights, and integrated scratching surfaces alongside the human book storage function. The result is a piece of furniture that serves both human and cat purposes simultaneously, takes up exactly the space a bookshelf would take up anyway, and looks intentional rather than like a cat accessory has been added to a human room.
The concept: Purchase or build a bookshelf with adjustable shelves. Position shelves at cat-appropriate heights — 12, 24, 36, and 48 inches from the floor. Add faux fur shelf liners on the cat-designated shelves. Attach a sisal-wrapped post to one side of the bookshelf. Position the unit against the wall with the best window view.
The key detail: The top of the bookshelf becomes the highest perch. Ensure the top is cleared enough for a cat to lie comfortably and covered with a removable faux fur mat.
Best for: Small spaces where a dedicated cat tower would dominate the room. Owners who want integrated cat furniture that looks designed rather than added.
Build 5: The Natural Branch Tower
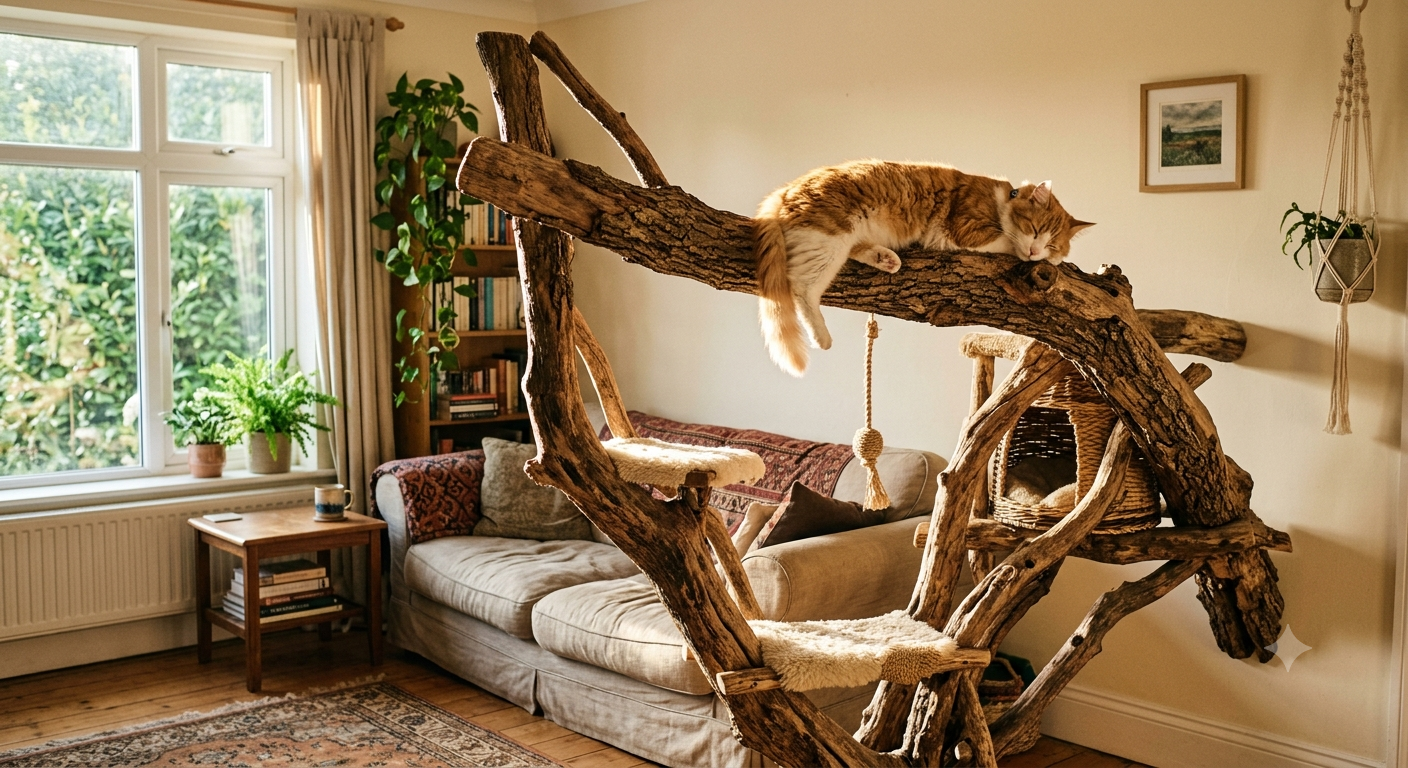
Why it works: A real tree branch — found in a park after a storm, collected from a garden, or sourced from a tree service — creates the most texturally rich and visually extraordinary cat tower available. The irregular surface, the natural branching structure, and the organic form produce a piece that looks like deliberate interior design rather than pet furniture.
The practical requirements: The branch must be thoroughly dried before use — several months in a dry space or a brief period in a low oven accelerates this. Any bark that is loose should be removed. Sand any sharp branch stubs to prevent eye and paw injuries. Seal with a pet-safe wood sealant or beeswax to prevent splinter development.
Base construction: The branch is anchored in a weighted concrete base — a bucket or decorative pot filled with concrete, with the branch base set into it before the concrete cures. The base must be heavy enough to prevent tipping — plan for at least 20 pounds of concrete for a branch extending beyond 4 feet.
Platform addition: Small wooden platforms are lag-bolted to appropriate branch sections. A large platform at the top or on the strongest upper branch creates the primary resting spot.
Build 6: The Ladder Tower
Why it works: A wooden ladder — a short decorative ladder or a full-height structure built specifically for the purpose — provides a structurally complete cat tower with very little additional build work. The existing rungs become the platforms, and the two upright rails provide the structural stability.
Materials: A wooden ladder (repurposed or purpose-built from 2×2 lumber), sisal rope for the uprights, small platform extensions attached at each rung level, and a base plate for freestanding stability.
Time to build: Approximately three hours for a repurposed ladder, six to eight hours for a purpose-built version.
Build 7: The Wall-Mounted Climbing Tower
Why it works: A series of wall-mounted platforms — staggered at increasing heights — connected by sisal-wrapped climbing posts creates a vertical climbing environment that uses wall space rather than floor space. For small apartments, this is the design that provides maximum vertical enrichment at minimum floor footprint.
This design is addressed fully in Article 8 (DIY Cat Wall Shelves), but in its most elaborate form — with multiple connected platforms and climbing routes — it becomes a complete vertical environment rather than simply a shelf collection.
The key distinction from simple shelves: The climbing tower wall design includes transitional elements between platforms — small stepping platforms, rope bridges, or angled ramps — that allow the cat to travel the full height of the installation rather than jumping between disconnected shelves.
Build 8: The Condo Tower — Full Enclosed Design
Why it works: The condo tower — incorporating enclosed sleeping pods alongside open platforms and scratching posts — is the most feature-complete DIY cat tower design available. It addresses every behavioral need simultaneously: observation (high open platforms), privacy (enclosed pods), scratching (sisal columns), and play (hanging toys, tunnels between levels).
Materials for a full condo build:
- 2×4 framing lumber for the primary structure
- Plywood for enclosed pods and platform bases
- Sisal rope for all vertical columns
- Faux fur for platform and pod interiors
- Carpet for platform tops
- Wood glue and 2-inch screws throughout
- One 4×8 sheet of plywood yields sufficient panel material for a 5-foot design
Build sequence: Frame the base unit first — the most stable foundation determines the whole structure’s safety. Build upward one level at a time, verifying stability at each level before adding the next. Enclose the pods last, once the structural framing is confirmed solid.
Time investment: 15 to 20 hours for a full condo tower with three to four levels. The result is a commercial-quality installation at approximately 20% of the retail cost.
Common Mistakes That Ruin DIY Cat Towers
The wrong carpet: Looped carpet catches claws and causes injuries. Cut-pile carpet only for any surface a cat will stand or walk on.
Insufficient sisal rope gauge: Thin sisal rope wears through quickly and provides an inadequate scratching surface. Use at least 1/4-inch diameter rope. 3/8-inch is better for primary scratching columns.
Platforms too close together: Platforms placed fewer than 12 inches apart vertically prevent the cat from fully assuming a perched sitting position. Minimum 14 inches between platform surfaces for standard cats, 18 inches for large breeds.
Unstable base on carpet: On carpeted floors, the tower’s base sinks into the carpet slightly, affecting the stability calculation. Always test the final tower placement before considering the build complete.
No odor finishing: A cat who has not scent-marked a new tower will often not use it. Place a worn item of your clothing on the highest platform during the introduction period — your scent makes the tower familiar and safe.
Introducing Your Cat to the New Tower
Place the tower where the cat already likes to spend time, not where it is most convenient for you. If your cat already prefers the arm of the sofa near the east window, the tower should go near the east window — not in the corner you have designated for it.
Use catnip rubbed on the platforms and scratching columns to invite investigation. Place treats at progressively higher levels to encourage ascent. Do not carry the cat to the tower or attempt to demonstrate use — cats do not learn from demonstration. They learn from their own investigation when the conditions make investigation rewarding.
Most cats begin using a correctly positioned, stable tower within three to seven days. The cat who takes three weeks is not a cat who does not want the tower — they are a cat who needs more time to trust it.
The DIY cat tower you build this weekend will still be in your home — fully used, structurally sound, and looking better than it did on day one as the sisal ages into a warm honey color — years after any commercial cat tower you might have bought would have been replaced.
Your cat’s behavioral needs are real. Their need for height is real. The scratching is real, and the territory marking is real, and the satisfaction they take from a high perch with a view is genuinely, measurably real. The tower you build for them is the answer to all of it at once.
Save this guide to Pinterest, share it with every cat owner who has donated a store-bought tower to charity after three months of non-use, and make the one that your cat will never leave