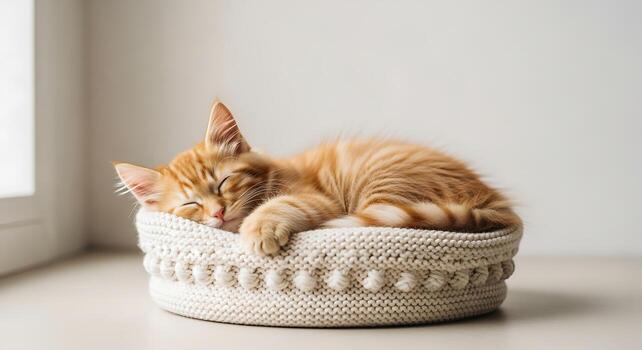
You have bought four cat beds. Your cat has slept in exactly zero of them. The flat, round bed from the big box store sat untouched for three months before you moved it to the closet. The hooded one was investigated once and declared unacceptable.
The heated memory foam one — the one that cost $45 — is currently being used by you as a footrest because the cat decided the cardboard Amazon box was superior. Sound familiar? Here is the truth that experienced cat owners and crocheters already know: a handmade crochet cat bed has a dramatically higher adoption rate than any commercial option, for two reasons that are completely logical once you understand them.
First, it carries your scent and your home’s ambient smells from the moment of completion — no warehouse, no packaging, no unfamiliar odors. Second, you can build it to match your cat’s specific sleeping preferences, whether that means open and sprawling or enclosed and cave-like. If you have spent any time with cats in your home, you know that cat beds can be a take-it-or-leave-it sort of thing — but a DIY crochet cat bed has a better chance of winning them over because it’s unique to them.
This guide covers eight crochet cat bed styles from the simplest beginner project to the most impressive cave build, each with full construction details, yarn requirements, and the specific design insight that makes each style worth making.
Before You Start — The Two Questions That Determine Which Bed Your Cat Will Love
Watch your cat first. Is your cat a curler or a stretcher? The right size matters. Some cats love fuzzy textures, others prefer smooth yarn.
A cat who curls into a tight ball and seeks enclosed spaces needs a cave, a basket with high walls, or a sack design. A cat who sprawls sideways and sleeps in open positions needs a wide, flat mat or a low-sided open bed. Observe your cat’s preferred sleeping position and current favorite sleep location before choosing a design — the shape of where they already choose to sleep is the best possible guide to what you should build.
The best yarns for cat beds are chunky or super bulky acrylic yarns that are machine washable. A cat bed that cannot be washed is a cat bed that will smell unpleasant within weeks and be abandoned. Machine-washable acrylic in a bulky or super-bulky weight is the correct choice for every bed on this list unless specifically noted otherwise. It is durable, washable, available in every color, and produces a soft, plush texture that cats accept readily.
Bed 1 — The Classic Round Basket Bed (Beginner, 2 to 3 Hours)
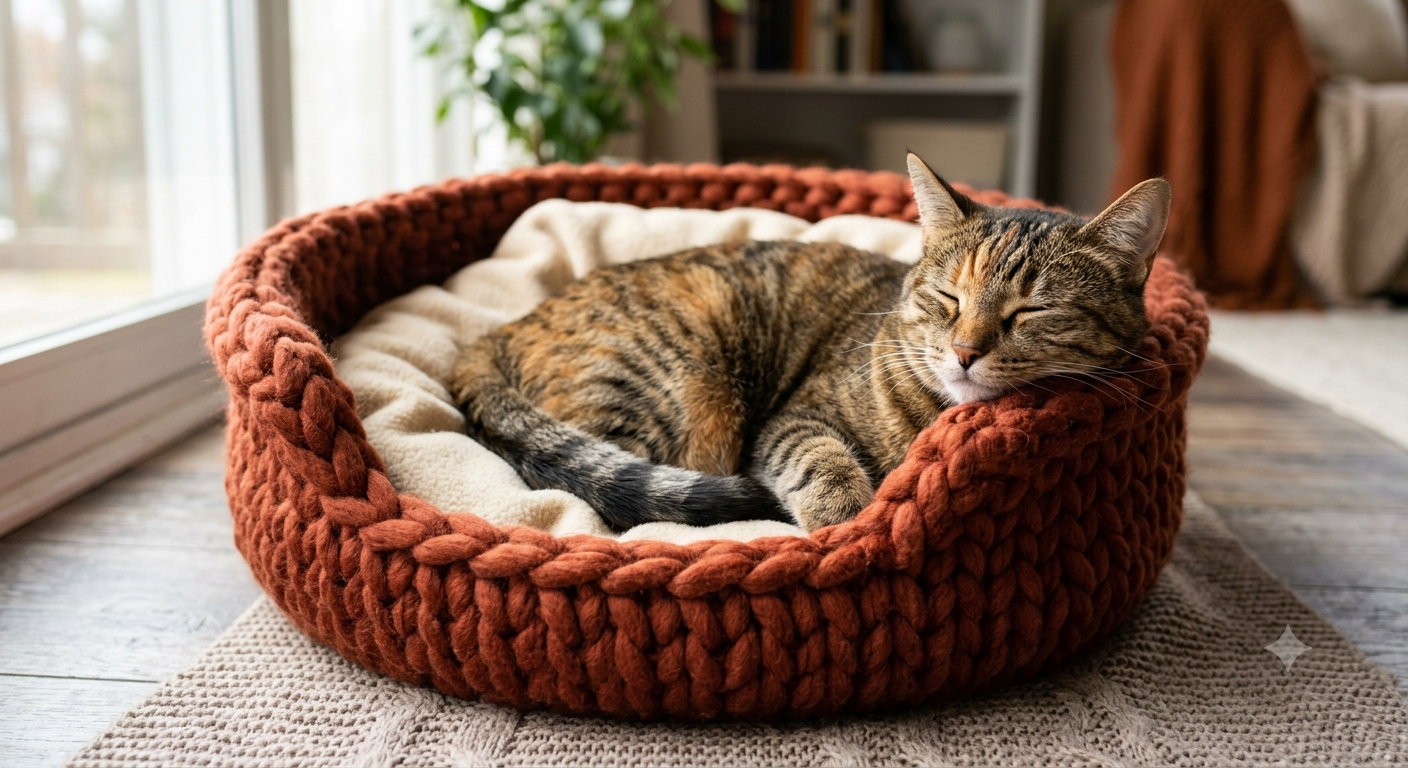
This Cozy Cat Bed is a beginner-friendly cat basket-style bed made with super bulky Bernat Blanket yarn. It is the bed that beginners should make first because it teaches every foundational technique used in every other design — working in the round, increasing to build a flat circle base, and switching to single crochets without increases to build the walls.
Materials
Two skeins of super bulky weight yarn in your chosen color — approximately 220 yards total. A size 9mm or 10mm crochet hook. A yarn needle for weaving ends. Optional: polyester fiberfill stuffing for adding to the rim.
Construction
Create a magic ring and work 6 single crochets into it. Pull the tail tight to close the center. Round 2: increase in every stitch for 12. Round 3: single crochet 1, increase, repeat for 18. Round 4: single crochet 2, increase, repeat for 24. Continue increasing with one additional single crochet between increases in each round until you reach approximately 60 stitches and the base measures 14 to 16 inches in diameter. At this point, work all stitches through the back loop only for one round — this creates the crisp right-angle fold where the base meets the walls. Then work normally through both loops for 6 to 8 rounds of single crochets without any increases or decreases to build the walls to your desired height. Slip stitch to join the final round and fasten off. Weave in all ends.
The bed should be 18 inches in diameter and 4 inches tall as a baseline for most cats. They like to place their paws into the rim as they sleep. Folding down the edge over polyfil gives the rim a stable, padded feel that cats prefer.
The finishing detail that changes everything: Fold the top 2 to 3 inches of the wall outward and stuff it lightly with fiberfill before slip stitching the fold down. This creates a padded rim that cats invariably use as a chin rest — the physical detail that transforms this from a basic yarn circle into something a cat actually uses every day.
Bed 2 — The Jumbo Yarn Quick Bed (Beginner, Under 1 Hour)
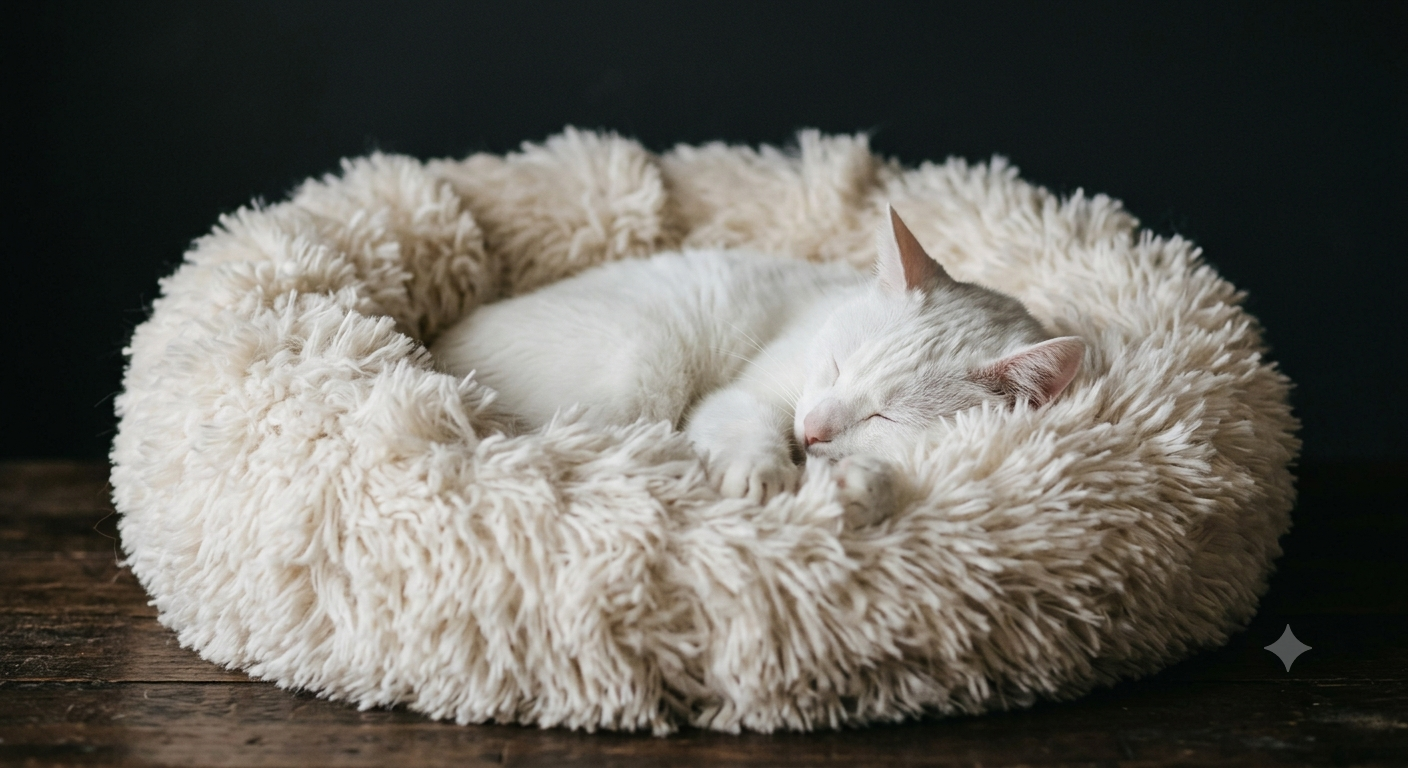
Made with jumbo yarn and a big hook, this Big Little Pet Bed is a great project to build a beginner’s confidence. It looks incredible, though it’s rather easy to stitch together.
Materials
One to two skeins of jumbo-weight arm-knitting or super chunky yarn — approximately 100 to 150 yards. A size 15mm to 20mm hook. A yarn needle.
Construction
The jumbo yarn bed uses the same round base pattern as the classic basket bed but works up so quickly that the entire project, including the base and walls, can be completed in under an hour. Work a magic ring, 6 single crochets, and complete the increasing rounds until the base is the correct diameter for your cat. Switch to building the walls without increases for 4 to 5 rounds. The massive scale of the stitches means each round adds visible height rapidly, and the finished bed has a characteristically plush, fluffy appearance that photographs beautifully.
This fable fur yarn pattern creates a gorgeous and fluffy bed because it calls for a larger crochet hook. It works up much quicker than you’d think, and it’s beginner-friendly. The insert is removable, making it easy to wash. Faux fur yarn — the type with the long, fluffy fibers — transforms this simple construction into a bed that looks extraordinary in photographs and feels irresistible to cats who love soft, plush surfaces. The long fibers mean you need to work slowly and check each stitch placement carefully, but the result justifies the extra attention.
Bed 3 — The Cat Cave (Intermediate, 4 to 6 Hours)
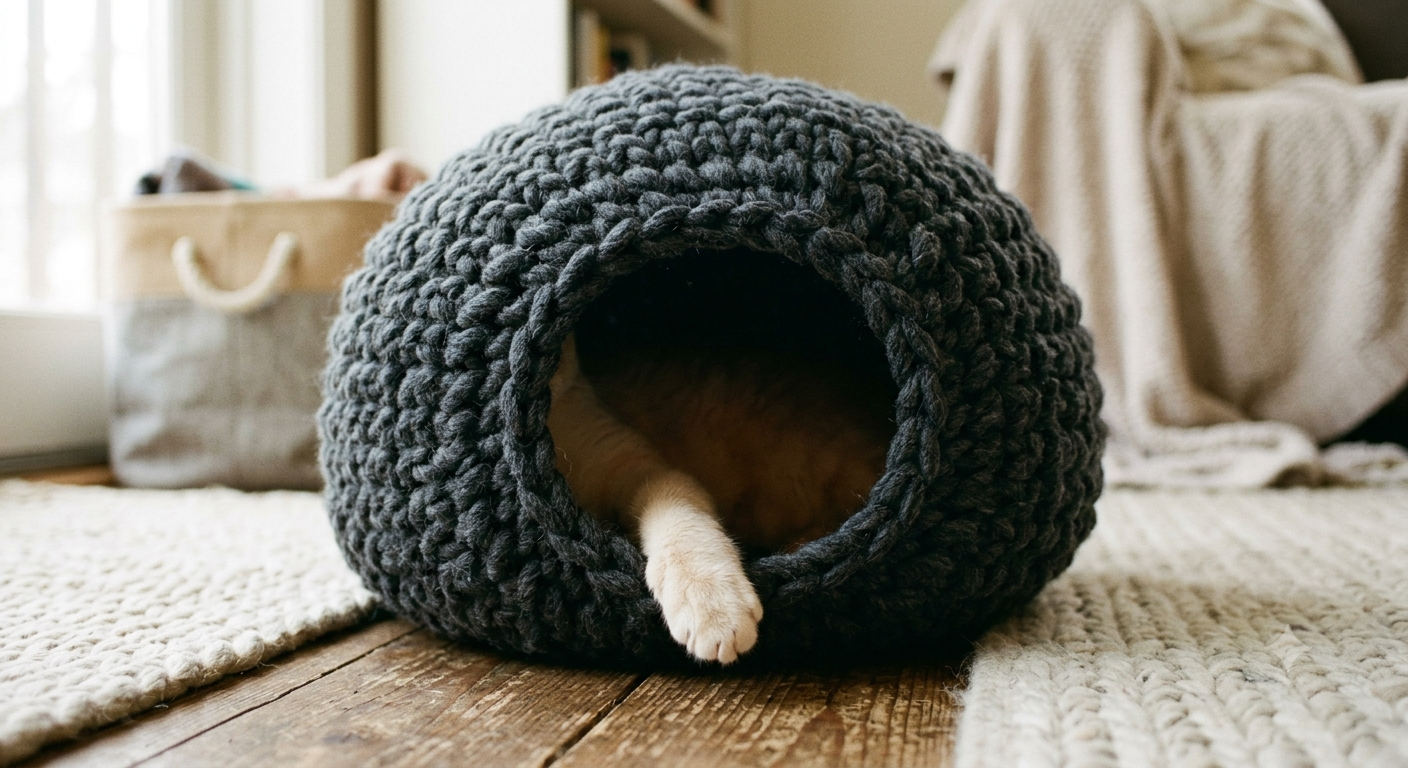
Cat caves have become really popular. Not only are they warm and comfortable for the cats that are lucky enough to sleep in them, but they can also add a homely look to a room. The crocheted cat nest is a cave-style design that will need intermediate crochet skills to complete.
The cat cave is designed for cats who hide. If your cat sleeps under the bed, inside boxes, in the back of closets, or curled in any enclosed space, they need a cave, not an open bed. The cave satisfies the denning instinct more completely than any other bed style and produces dramatically higher adoption rates in shy, anxious, or cold-sensitive cats.
Materials
Four to five skeins of bulky weight yarn — approximately 400 to 500 yards total. A 6mm or 8mm hook. A yarn needle. One cardboard circle cut to the cave base diameter for structural support. Polyester fiberfill for the dome structure.
Construction
This project requires working in continuous rounds, with a portion that requires turning the piece between rows. With a series of half double crochets, increases, and decreases, you’ll shape the bed, finally cinching the top closed. To ensure the cat bed maintains its shape, a painted cardboard insert is recommended.
Begin with a magic ring and work 6 half double crochets. Increase every stitch for round 2, giving 12. Continue the standard increasing pattern using half double crochets through both base and beginning wall rounds until the base reaches approximately 16 inches in diameter. The half double crochet produces a denser, stiffer fabric than single crochets, which is essential for a cave structure that needs to hold its dome shape.
To begin the cave roof, start decreasing on one side of the circle while continuing to increase on the other — this asymmetric shaping creates the dome that arches over the entry opening. Work the decreases at the back of the dome and continue the increases at the entry side for several rounds, then begin decreasing all around to bring the dome to a close at the top. Insert the cardboard circle into the base before closing the final stitches, and add fiberfill to the dome cavity if the walls are not stiff enough to self-support. The entry opening is simply left unworked during the decreasing phase — the gap where you stopped adding stitches becomes the door.
For cats who love the cave but need extra warmth: This cat cave looks more like a giant sock and is ideal for felines that like the enclosed sleeping position. The enclosed design wraps completely around the cat, creating the maximum sense of security.
Bed 4 — The Cat Ear Novelty Bed (Intermediate, 3 to 4 Hours)
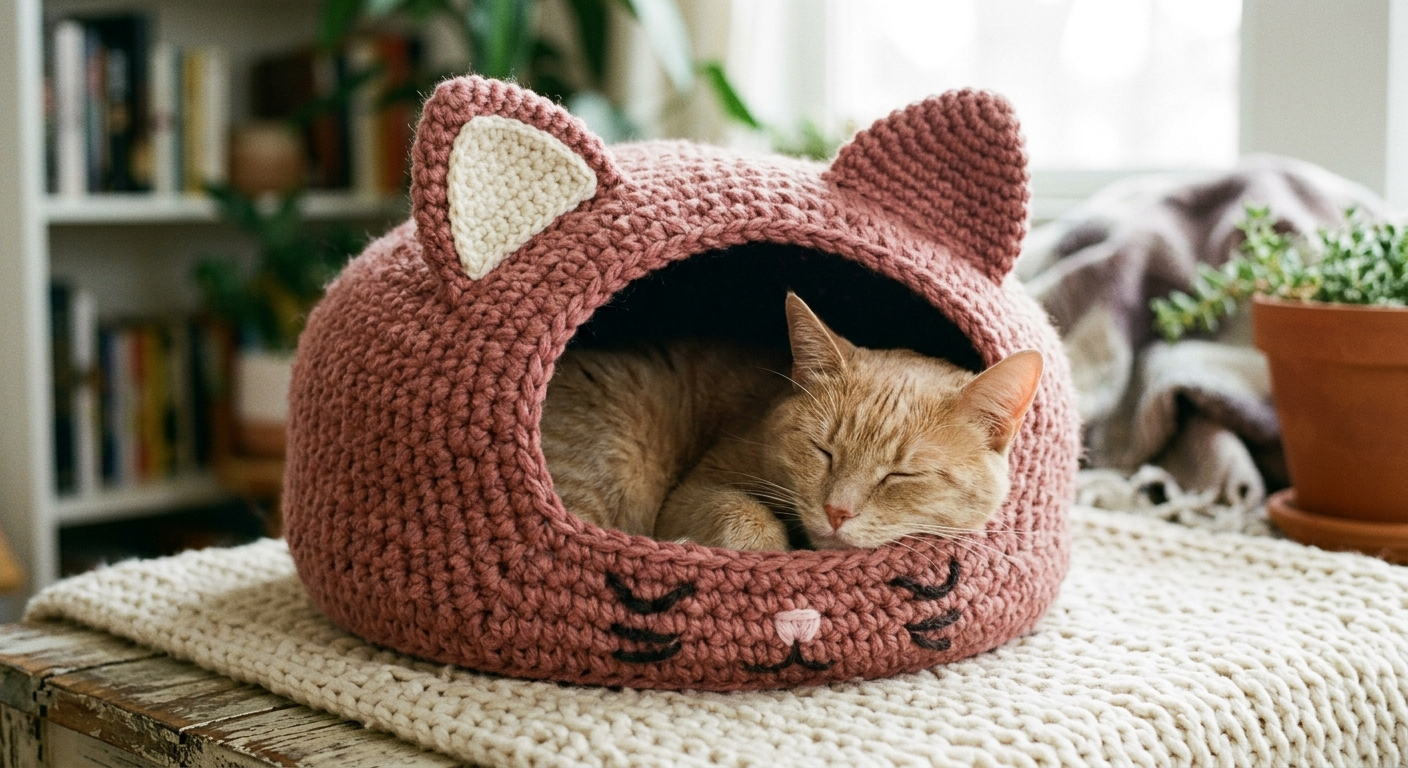
This cat bed is all stitched with a single color of yarn, but it has a unique appearance thanks to the cat ears stitched into the top. It’s complete with whiskers, a nose, and even eyes, giving it more character than any other bed.
The cat ear bed is the design that appears most frequently on Pinterest because it photographs so well — the ears and face details transform a simple round bed into something immediately recognizable and shareable. It is also genuinely well-suited to cats who like moderate wall height with an open top, because the structure provides the enclosed sides they seek, while the open top allows them to maintain awareness of their environment.
Materials
Three skeins of bulky yarn in the main color. A small amount of contrasting yarn for the inner ear color and face details. Embroidery thread for whiskers. A 6mm hook. Black safety eyes — optional, 12mm diameter. Polyester fiberfill for the ears.
Construction
Work the base and walls using the classic basket pattern, sized to your cat’s measurements. For the ears, make two small rounded triangles — start with a chain of 10, work single crochets across, then increase at each end of every row for 4 rows to create the triangular ear shape. Make a second identical triangle in the contrasting inner ear color that is one row smaller on each dimension. Place the contrasting piece on top of the main earpiece and slip stitch around the edge to join. Stuff each ear lightly with fiberfill and sew them to the folded rim of the bed at the correct angle — typically at the ten o’clock and two o’clock positions on the rim circle.
For the face details, use embroidery thread for whisker lines stitched through the outer wall of the bed near the entry side, and add the safety eyes or embroidered eyes above the whisker placement. A small nose worked in contrasting yarn using a French knot completes the face. The result is a bed that is impossible to scroll past without stopping.
Bed 5 — The Granny Square Mat (Beginner, Variable Time)
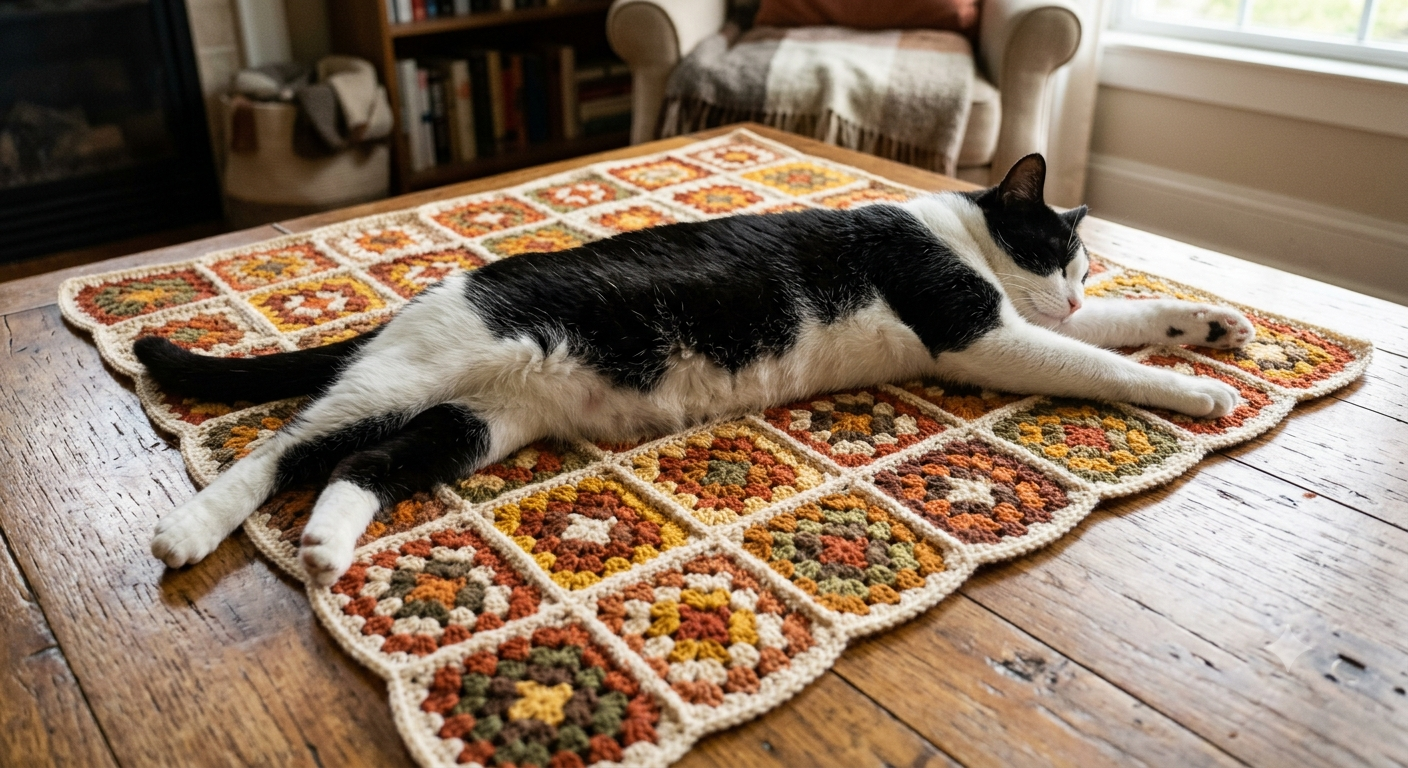
The classic granny square pattern makes a wonderful cat mat. The squares work up quickly and join together to create a thick, comfy base. This mat is flat enough for cats who like to stretch out but still offers cushioning.
For the cat who spreads out completely — the sideways sprawler, the belly-up flopper, the full-extension stretcher — a flat mat is the correct bed style. Granny squares joined into a mat provide the thickness and cushioning of a structured bed without the walls that a sprawling cat finds restrictive.
Construction
Work standard granny squares in your chosen size — 6 to 8 inch squares are practical for building a full cat mat efficiently. A mat of 4×4 squares produces a comfortable 24×24 inch surface for a medium-sized cat. Join the squares using the slip stitch join method for a flat, subtle seam, or the single crochet join for a raised seam that adds textural interest. Work a single crochet border around the entire assembled mat for a clean finished edge that prevents curling. A light polyester fiberfill batting cut to size and placed beneath the completed mat, held in place by a simple slip-stitched backing fabric, adds significant cushioning without changing the top surface.
Bed 6 — The Self-Covering Blanket Bed (Intermediate, 4 to 5 Hours)
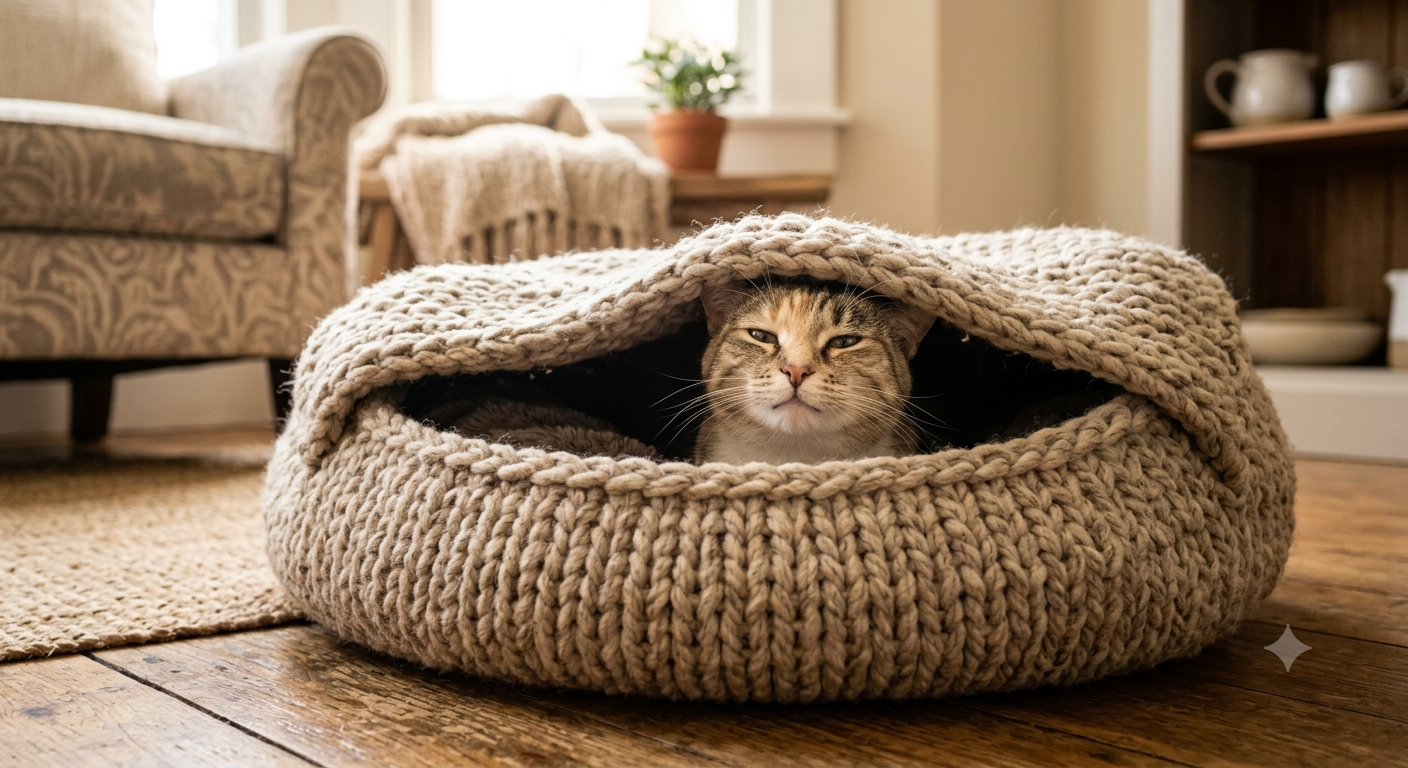
This smart design includes an attached flap that cats can pull over themselves when they want extra warmth. It satisfies the digging and nesting instinct that many cats have. One cat learned to pull the flap over himself within days of getting his new bed.
This design addresses the specific behavior that baffles many cat owners — the cat who kneads and rearranges any fabric they sleep on before settling, or who burrows under blankets. The attached flap is not a gimmick. It is a behavioral accommodation for a cat whose nesting instinct is strong, and it produces one of the most enthusiastic adoption responses of any bed style in this guide.
Construction
Crochet a standard oval base for the bed — chain 20 to begin the oval, then work single crochets around both sides of the chain in continuous rounds, increasing at each short end to maintain the oval shape, until the base is 24 inches long. Build walls of 4 inches around the entire perimeter. At one short end, instead of building the wall to full height, work only 2 extra rounds and then begin working flat in rows rather than rounds — the flat section extends over the interior of the bed as a flap rather than completing the circular wall. Continue the flat rows until the flap reaches approximately one-third of the bed’s interior length. Fasten off and weave in ends. The flap hangs over the interior, and the cat can root it aside when entering and then nestle beneath it after settling.
Bed 7 — The Teepee Bed (Intermediate, 5 to 6 Hours)
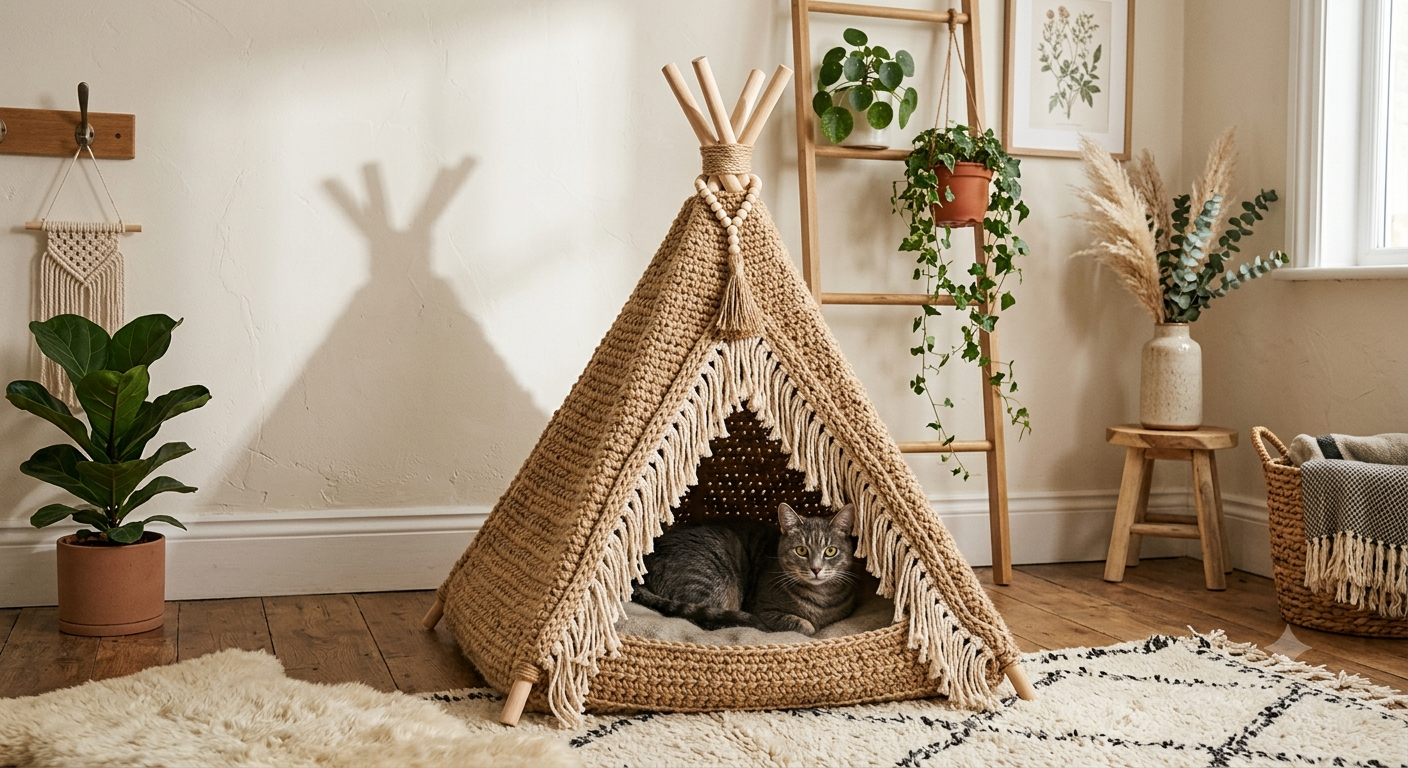
This tall, pointed bed gives cats a fun hideaway that stands out from typical pet beds. The structure uses simple increases and decreases to create the classic teepee shape.
The teepee is the cat bed that functions as a room décor statement as readily as it functions as a sleeping space, and it is the correct choice for an enclosed-preference cat in a home where the owner wants the furniture to look intentional. It photographs as art, and the enclosed shelter quality means cats who love it love it with unusual intensity.
Construction
Work a flat circle base as in the classic basket bed, sized to approximately 16 inches in diameter. Then begin building the walls, but instead of keeping the stitch count consistent, very gradually decrease every 8 to 10 rounds — one invisible decrease per 6 stitches in the decrease round, with several even rounds between decrease rounds. This slow decrease causes the walls to lean inward progressively, creating the conical teepee silhouette. At approximately 18 to 24 inches in height, the opening will have narrowed naturally to the appropriate entry size. Fasten off and add a decorative pompom at the tip.
The entry opening is established during construction rather than cut — simply leave a 6 to 8 inch gap at one side during the final 4 to 5 decrease rounds before closing the tip, and single crochet around the gap edges for a neat finished entry.
Bed 8 — The Mandala Round Bed (Intermediate to Advanced, 5 to 7 Hours)
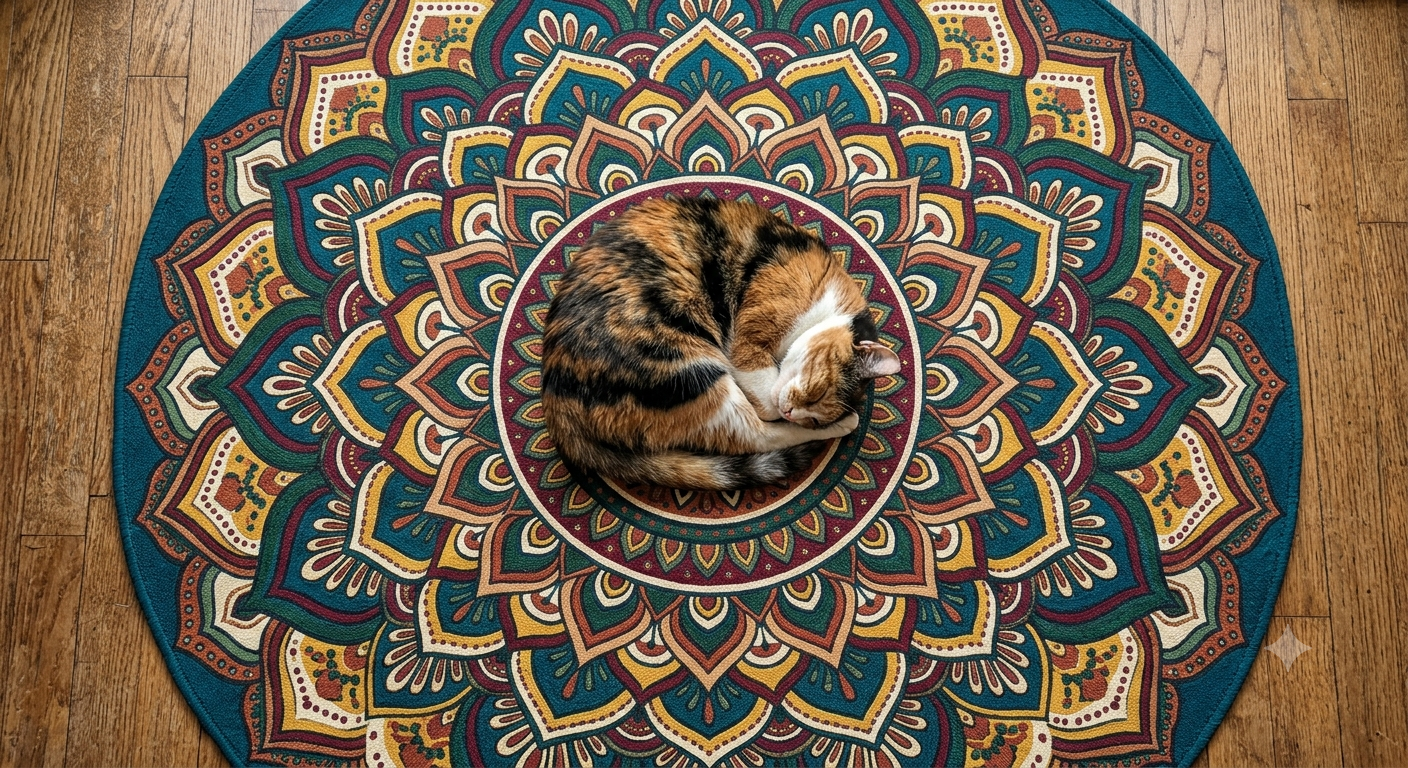
Based on mandala patterns, this round bed features flower-like stitch work that radiates from the center. The textured surface gives cats something interesting to knead. Each one is unique and beautiful in different color combinations.
The mandala bed is the design for the crocheter who has made the basket bed twice and the granny square mat, and is ready for something that combines a high-function cat bed with genuinely beautiful textile art. The radial color work of a mandala pattern creates a flat, cushioned surface with enough textural interest to satisfy a cat’s need to knead before settling, and enough visual beauty to be worth leaving out as a room accessory when the cat is elsewhere.
Construction
Work from the center out using the standard mandala increase rounds, but substitute popcorn stitches or bobble stitches at regular intervals within the increase pattern to create the raised floral center motif. Alternate colors every 2 to 3 rounds, carrying the yarn loosely at the color-change points for a neat back. The base is built entirely flat without walls — the mat lies flat on any surface, and the cat sleeps on rather than in it. A non-slip backing fabric cut to the mat’s dimensions and whip-stitched around the perimeter prevents the mat from sliding on smooth floors.
The color combinations that produce the most visually striking results follow the color wheel — warm analogous combinations of orange, gold, and rust; cool combinations of sage, teal, and cream; or bold complementary pairs of navy and gold.
The Bed Your Cat Uses Is Better Than the Perfect Bed They Ignore
Every bed in this guide works because it was built for a specific type of cat sleeper. Match the design to your cat’s preferences, and the adoption is almost guaranteed. Make it from machine-washable yarn so you can maintain it properly. Carry it around the house in your hands for an afternoon before you give it to your cat so your scent permeates the yarn. Place it in the location where your cat already sleeps. And then wait — because a cat who discovers something they actually wanted never makes a big production of it. They simply get in, turn in a circle, and close their eyes.