If you’ve been scrolling through Pinterest, saving every crochet cat toy you come across but never actually making one because you’re convinced it’s too hard, this guide is written specifically for you. The truth is that crochet cat toys are one of the best first projects any beginner crocheter can attempt, because they’re small, they work up fast, the stakes are low, and the result is something your cat will genuinely use and love. This summer, instead of saving more pins you never act on, you’re going to make your first crochet cat toy from scratch, with zero prior experience required. By the end of this guide, you will have finished a real, beautiful, catnip-stuffed toy your cat will obsess over, and you’ll have learned every foundational crochet skill you need to tackle every other toy in this blog.
What This Guide Covers
This is not a pattern dump. This is a genuine step-by-step walkthrough that starts at the very beginning — holding the hook, making your first knot — and ends with a finished toy in your hands. You’ll learn the magic ring, the single crochet, the increase, the decrease, how to stuff and close a toy, and how to add finishing details that make your cat toy look polished and intentional rather than homemade in a rushed afternoon. Every technique is explained in plain language, not crochet shorthand, so you never have to stop and Google what an abbreviation means.
Part One — Everything You Need to Buy Before You Start
The Right Hook for Beginners
The single most common beginner mistake with crochet cat toys is using the wrong hook size. Too large and your stitches will have gaps that stuffing pokes through. Too small and your hands will cramp within twenty minutes. For the yarn weights most commonly used in cat toys — DK or worsted weight — a 3.5mm hook is the sweet spot. It creates tight enough stitches to hold stuffing inside the toy without being so tight that every stitch is a struggle. If you have larger hands or a naturally tight tension, go up to a 4mm. Ergonomic hooks with a rubber grip handle are worth the small extra cost if you plan to make more than one toy, which you will, because this is immediately addictive.
The Best Yarn for Crochet Cat Toys
Not all yarn is equal when it comes to cat toys. The difference matters for both the finished look and your cat’s safety. Acrylic yarn in worsted or DK weight is the most beginner-friendly choice — it’s widely available, inexpensive, holds its shape well, washes easily, and comes in every summer color you could want. Avoid mohair or any yarn with long, loose fibers because cats can ingest those fibers during play, and that creates a genuine health risk. Avoid very slippery yarns like silk or bamboo blends because they’re difficult to crochet tightly enough to contain stuffing. Cotton yarn works well for toys that will be used roughly because it’s extremely durable, though it has less stretch than acrylic and can feel stiffer in the hands. For your first toy, grab a skein of worsted-weight acrylic in whatever summer color makes you happiest and don’t overthink it further.
Everything Else You Need
Beyond the hook and yarn, gather these before you sit down: polyester fiberfill for stuffing, dried catnip to mix into the stuffing, a yarn needle with a large eye for weaving in ends and sewing pieces together, stitch markers (a spare piece of contrasting yarn works perfectly if you don’t have official markers), small black safety eyes in 6mm or 9mm size, embroidery thread in black or grey for detail work like whiskers and seeds, and scissors. Optional but genuinely worth having: a small square of crinkly material cut from a crinkly baby toy or a potato chip bag washed and dried, which creates an irresistible sound inside stuffed toys that drives cats absolutely wild.
Part Two — The Four Skills You Need to Know
Skill One — The Slip Knot
Every crochet project starts here. Make a loop with your yarn so the tail end crosses over the working yarn coming from the ball. Insert your hook into the loop from front to back, catch the working yarn with the hook tip, and pull it through the loop. Pull both yarn ends gently to tighten the knot around the hook shaft. The knot should sit snugly but slide freely — if it’s locked tight, it’s too tight, if it slips off the hook when you tug it’s too loose.
Skill Two — The Magic Ring
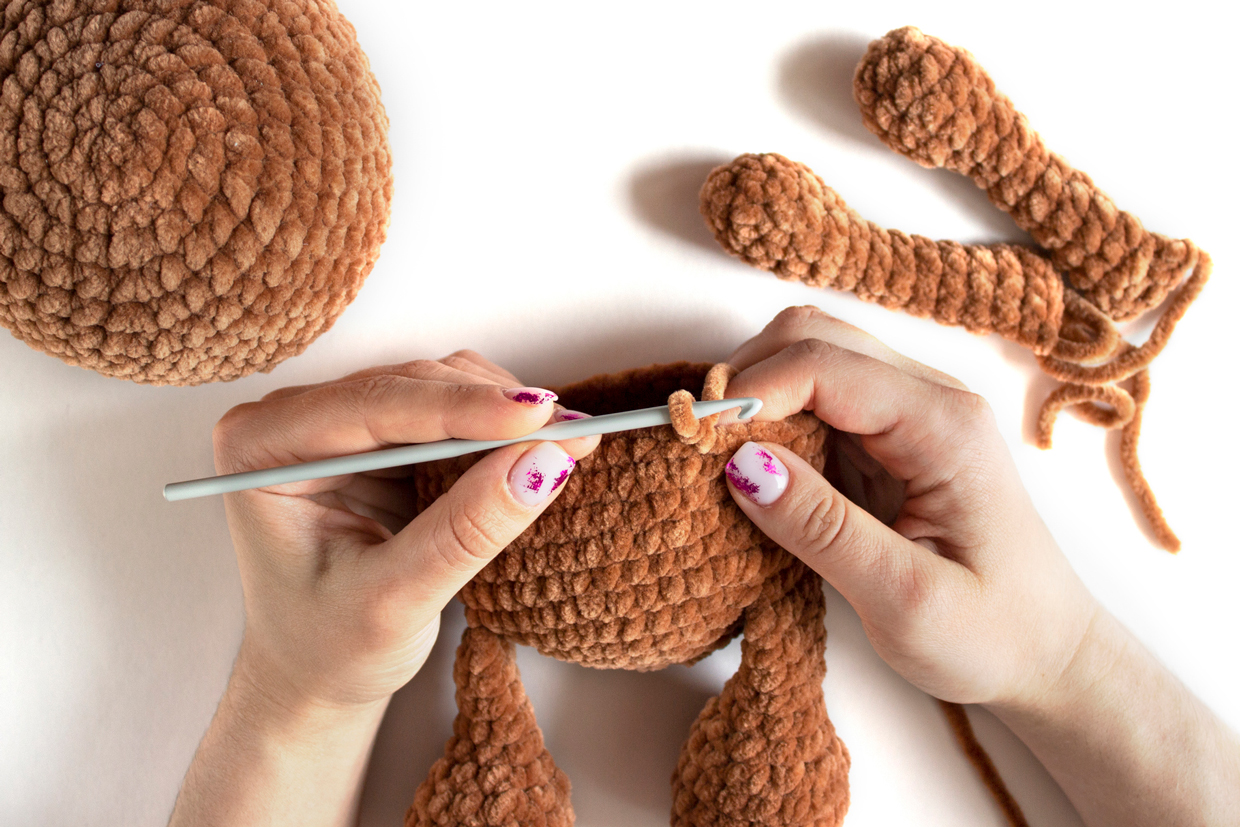
The magic ring is the starting point for almost every crochet cat toy because it allows you to begin crocheting in a circle and pull the center hole completely closed, which means no stuffing escapes through a gap in the middle of your toy. Wrap the yarn twice around your index and middle fingers held together so you have two loops sitting side by side. Slide both loops off your fingers carefully while keeping them looped. Insert your hook through the center of both loops from front to back, catch the working yarn with your hook tip, and pull up a loop — this is your first loop on the hook. Chain 2 if your pattern calls for it, or proceed directly to single crochets. Work the number of single crochets your pattern calls for directly into the center of the ring, working over both strands of the ring as you go. When you’ve worked all the stitches, pull the yarn tail firmly to close the center hole. Your magic ring is complete.
Skill Three — The Single Crochet
The single crochet is the only stitch you need for every toy in this guide. Insert your hook into the stitch you want to work into, going under both loops of the stitch unless your pattern specifies otherwise. Catch the working yarn with your hook tip and pull it through the stitch — you now have two loops on your hook. Catch the working yarn again and pull it through both loops on the hook. One loop remains on the hook, and one single crochet is complete. The increase is simply two single crochets worked into the same stitch. The invisible decrease is worked by inserting your hook through the front loop only of two consecutive stitches at the same time, pulling the yarn through both front loops, then completing the single crochet as normal — this creates a decrease that blends seamlessly into the fabric without leaving a visible gap.
Skill Four — Working in Continuous Rounds
Unlike flat crochet worked in rows, cat toys are worked in continuous rounds — you never turn your work or join with a slip stitch at the end of each round, you simply keep spiraling upward. This is why stitch markers are essential: place one in the first stitch of every round so you always know where the round begins and ends. Move the marker up with each new round. Working in continuous rounds is what creates the smooth, seamless surface of a well-made crochet cat toy, and once you get the rhythm of it — count, mark, crochet, count, mark, crochet — it becomes almost meditative.
Part Three — Your First Crochet Cat Toy, Step by Step
The Beginner Catnip Ball — The Perfect First Project
The catnip ball is the ideal first crochet cat toy because it uses every skill you just learned, it has no fiddly attachment pieces, it works up in under an hour, and the result is a perfectly round, satisfying toy your cat will play with every single day. Choose a bright summer color — coral, turquoise, or lemon yellow all photograph beautifully and make excellent Pinterest content when you share your finished result.
Materials for This Toy
You need one skein of worsted-weight acrylic yarn in your chosen color, a 3.5mm crochet hook, a yarn needle, polyester fiberfill, dried catnip, scissors, and a stitch marker.
The Pattern
Make a slip knot and place it on your hook. Create your magic ring and work 6 single crochets into it. Pull the tail tight to close the center hole. Place your stitch marker in the first stitch of the round.
Round 2: Work 2 single crochets into every stitch all the way around. You now have 12 stitches. Move your stitch marker to the first stitch of this new round.
Round 3: Alternate between a single crochet in one stitch and an increase of 2 single crochets in the next, all the way around. You now have 18 stitches.
Round 4: Work a single crochet in the first stitch, a single crochet in the second stitch, then an increase in the third stitch. Repeat this sequence all the way around. You now have 24 stitches.
Round 5: Single crochet in the first 3 stitches, increase in the fourth. Repeat around for 30 stitches total.
Rounds 6 through 10: Single crochet in every stitch around with no increases or decreases. These even rounds build up the middle section of the ball and give it its round shape. This is the most relaxing part of the project — just single crochet and breathe.
Round 11: Single crochet in the first 3 stitches, then work an invisible decrease in the next 2 stitches. Repeat this sequence around for 24 stitches.
Round 12: Single crochet in 2, invisible decrease. Repeat for 18 stitches.
Round 13: Single crochet in 1, invisible decrease. Repeat for 12 stitches. This is the point to stuff your toy. Take a generous pinch of fiberfill and push it into the ball, then add a good pinch of dried catnip on top of the fiberfill. The catnip scent will release every time your cat squeezes or bites the toy. Continue stuffing until the ball feels firm but not rock-hard — it should have a slight give when you squeeze it.
Round 14: Invisible decrease all the way around for 6 stitches.
Cut your yarn, leaving a 6-inch tail, thread it onto your yarn needle, and run the needle through the front loop of each remaining stitch, pulling them together like a drawstring and closing the hole. Pull tight, knot once, and weave the tail through several stitches inside the ball before cutting close to the surface. Weave in your starting tail the same way. Your first crochet cat toy is finished.
How to Know If You Made It Correctly
A well-made catnip ball should be roughly the size of a large golf ball or a small tennis ball. The surface should be smooth with no visible gaps between stitches. The stuffing should not be visible from the outside. When you squeeze it gently, it should hold its round shape and spring back. If you can see gaps, your tension was too loose — try going down half a hook size on your next attempt. If the ball came out oval rather than round, one of your increase rounds was worked unevenly — count your stitches at the end of each increase round going forward.
Part Four — What to Make Next
Building on Your First Toy
Now that you’ve completed the catnip ball, you have every skill needed to make the fish, the strawberry, the avocado, and the shrimp from the 15-toy listicle on this blog. The only new techniques those toys introduce are flat pieces worked in rows for fins and leaves, the loop stitch for texture variation, and the surface slip stitch for details like the waffle cone texture. Each of those techniques takes less than five minutes to learn, and every one of them is covered in the full tutorials for each toy.
The Summer Project Plan
If you’re planning to make multiple crochet cat toys this summer — and after finishing your first one, you absolutely will be — work in batches of color. Cut all your yarn lengths for one color at a time, make all the pieces of that color across multiple toys, then switch. This batching approach means you spend less time switching yarn and more time in the flow state of crocheting, which is genuinely one of the most relaxing things you can do on a summer afternoon.
Part Five — Photographing and Sharing Your Finished Toys
The Pinterest Photo Formula for Crochet Cat Toys
You made something beautiful, and your cat is already sitting on it. Before they destroy it completely, take a photo. The formula for a Pinterest-worthy crochet cat toy photo is simple: natural side light from a window, a clean, simple background in white, linen, or pale wood, your finished toy as the clear focal point, and either a cat interacting with it or your hands holding it for scale. Flat lays work beautifully for collections of toys. Action shots of your cat actually playing with the toy are the most shareable single images you can capture. The crinkle sound toys are especially good for action shots because the sound draws your cat in repeatedly, giving you multiple opportunities to capture the moment.
What to Write When You Pin It
When you share your finished toy on Pinterest, write a description that tells other pinners exactly what they’re looking at and why they should save it. Include the words crochet cat toy, cat toys DIY, and cat toys DIY easy naturally in your description. Mention the skill level, the approximate time it took, and what your cat’s reaction was. Personal details like “my cat carried this fish around for an hour straight” perform significantly better than generic descriptions because they’re specific, believable, and emotionally engaging.
Making Something With Your Hands Is One of the Best Things You Can Do This Summer
There is something genuinely satisfying about the complete arc of a crochet cat toy project — buying the yarn, learning the stitches, watching the shape emerge, stuffing it with catnip, and then watching your cat immediately claim it as their most prized possession. It costs almost nothing, it takes an afternoon, and the result is a handmade object made with intention and care that your pet will love. That is a good use of a summer day by any measure. Save this guide to your Pinterest board, share it with anyone you know who has a cat and a yarn habit, and come back when you’re ready for the next toy on your list. We’ll be here.