Your cat is bored, summer is here, and your yarn stash is quietly judging you from the corner of the room. This summer, cat parents everywhere are skipping the overpriced pet store aisle and making their own crochet cat toys at home — and the results are so cute they’re breaking Pinterest daily. Whether you’ve been crocheting for years or you just learned how to hold a hook last week, this guide walks you through 15 irresistible DIY cat toys with real, usable step-by-step instructions so you can actually sit down, make something beautiful, and hand it to your cat by the end of the afternoon. Spoiler: they will immediately knock it under the couch. That means it worked.
Before you dive in, here’s what you’ll want to have on hand for almost every toy in this list. A 2.5mm to 3.5mm crochet hook covers the majority of these projects. Worsted or DK weight yarn works best for durability and stitch visibility, especially if you’re a beginner. You’ll also want a yarn needle for weaving in ends, polyester fiberfill for stuffing, catnip for making your cat lose their entire mind, stitch markers, and a pair of scissors. Some toys call for safety eyes, embroidery thread for details like whiskers or seeds, and small amounts of crinkle material (the kind used in baby toys) if you want that irresistible crinkle sound cats are completely helpless against. Now let’s get into it.
1. The Classic Crochet Fish Toy
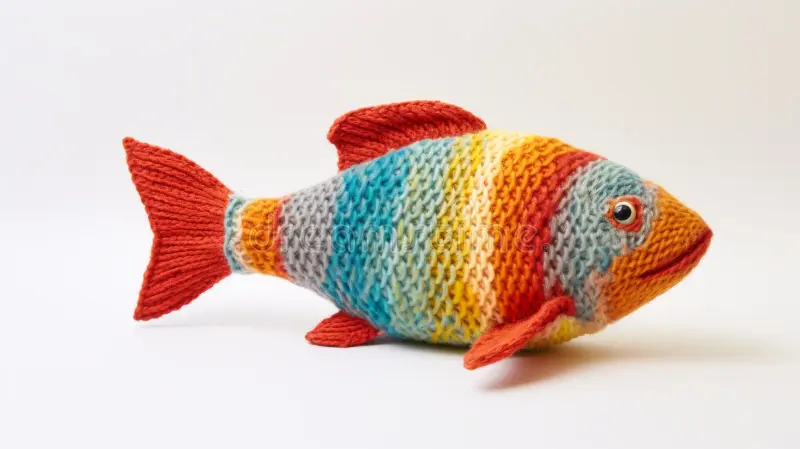
There is a reason the crocheted fish is the undisputed queen of cat toy DIY content on Pinterest. It photographs beautifully, it plays even better, and every single cat on earth has an ancient biological obsession with the shape of a fish. Add a catnip stuffing and a crinkly tail, and you have something your cat will carry around like a hunting trophy for weeks.
To make this one, you’ll start with a magic ring and work in continuous rounds, which means you’ll need a stitch marker to track where each round begins. Make a slip knot and create your magic ring, then chain 2 (this does not count as a stitch in this pattern). Work 6 single crochets into the magic ring and pull the tail tight to close the hole. That’s your first round — 6 stitches total.
Round 2: Increase in every stitch around by working 2 single crochets into each stitch. You now have 12 stitches. Round 3: Alternate between a single crochet and an increase all the way around, giving you 18 stitches. Round 4: Single crochet in the first 2 stitches, then increase in the third, and repeat that sequence around for 24 stitches. Rounds 5 through 10: Single crochet in every stitch around with no increases or decreases — just straight even rounds to build up the body of the fish. This is where you can start inserting a small square of crinkled material before you close up. Round 11: Begin your decreases by working an invisible decrease (insert hook into front loops only of the next 2 stitches and pull through both, then yarn over and pull through remaining loops), alternating with single crochets to taper the body. By Round 13, you should be down to about 12 stitches. Stuff firmly with fiberfill and catnip at this point, then continue decreasing until you have 6 stitches left and fasten off, leaving a long tail to sew the end closed.
For the tail, cut six to eight lengths of yarn about 4 inches long and fold them in half. Use your crochet hook to pull the folded loop through the last stitch at the back of the fish, then pull the loose ends through the loop and tighten. Repeat with all the strands for a full fluffy tail. Add safety eyes on Round 4 of the body, one on each side, and if you want to add a fin, simply single crochet 6 into a magic ring, chain 1, turn, and single crochet back across, then sew it onto the top of the body.
IMAGE SUGGESTION: Flat lay of the finished fish on a sandy linen background next to a pastel blue skein of yarn, a hook, and a small pile of dried catnip. A cat paw creeping in from the edge makes this Pinterest gold.
2. Tiny Crochet Sushi Roll Toy
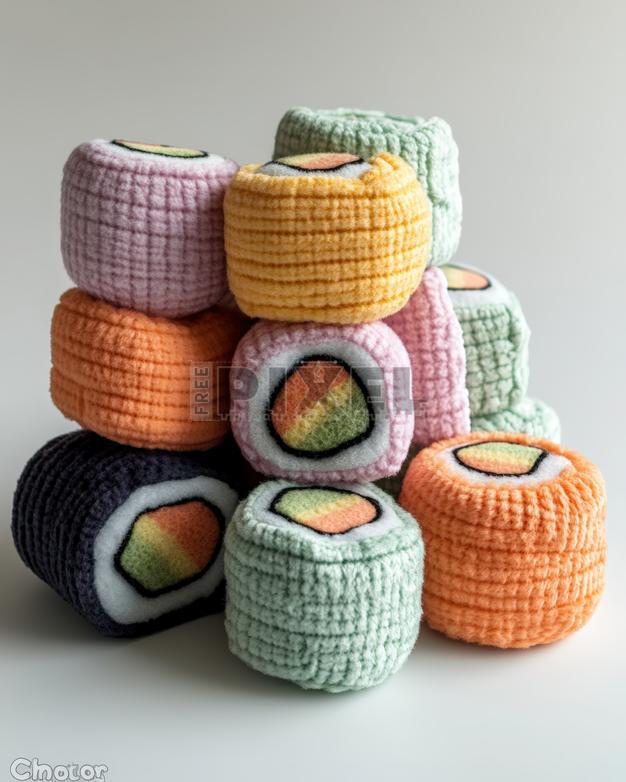
This is the cat toy that makes people stop mid-scroll and laugh out loud before saving it immediately. A miniature crocheted sushi roll — or better yet, a set of three — is summer DIY content at its finest, and your cat will bat these across the kitchen floor like they’re auditioning for a cooking show.
The sushi roll is essentially a small cylinder, and it comes together fast once you understand the construction. Start with black or dark grey yarn for the nori wrapper. Magic ring, chain 2, work 6 single crochets into the ring and pull tight. Round 2: Increase in every stitch for 12 stitches. Round 3: Alternate single crochet and increase for 18 stitches. This is your flat circle base. Now switch to working in the back loops only for Round 4 — single crochet in every back loop around. This creates a crisp right-angle edge that makes the cylinder shape clean and defined. Work 4 rounds of regular single crochets in both loops with no shaping. This is the body of the roll. Stuff lightly with fiberfill and add a few pinches of catnip.
Now you’ll make the filling. Using white yarn, make another flat circle following the same increase pattern up to Round 3 (18 stitches). This is your rice. With a small amount of pink or salmon-colored yarn, make a tiny oval using foundation chains: chain 5, single crochet in the second chain from the hook, single crochet in the next 2 chains, 3 single crochets in the last chain, then rotate and work back along the underside of the chain — single crochet 3, single crochet 2, slip stitch to join. This is your fish topping. Sew the white rice circle onto the top of the nori cylinder, and then sew the pink fish piece on top of that. Weave in all ends. Make three — tuna, salmon, and a simple cucumber roll in green — for a complete sushi set that will photograph beautifully and have your cat absolutely confused about what to attack first.
IMAGE SUGGESTION: Close-up of the three sushi pieces lined up in a row on a dark wooden surface, with a curious cat nose soft-focused in the background.
3. Crocheted Watermelon Slice Toy — The Summer Hero
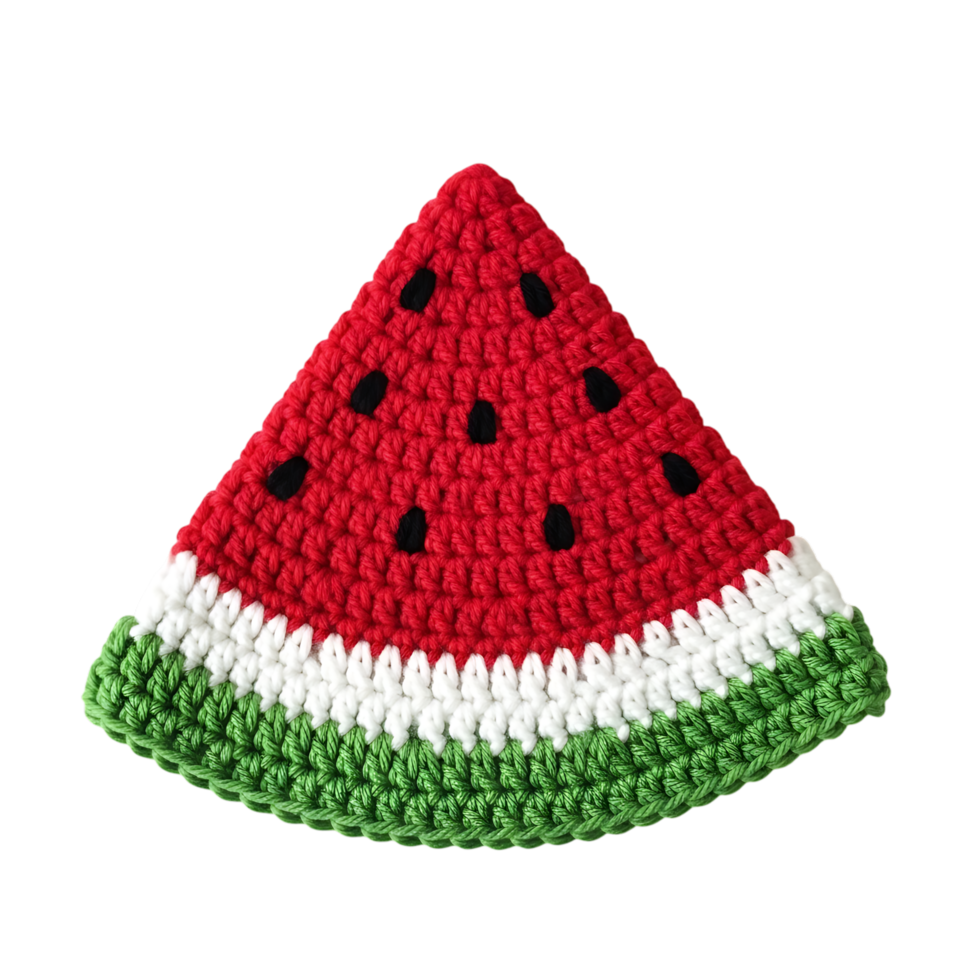
If there is one toy on this entire list that was made for summer Pinterest boards, it’s this one. The green rind, the pink flesh, the tiny black seed details — this crocheted watermelon slice is the kind of cat toy DIY that gets pinned thousands of times because it’s seasonal, adorable, and looks absolutely incredible in photos.
This toy is worked flat in rows rather than rounds, which actually makes it faster and more beginner-friendly than it looks. Start with green yarn and chain 15. Row 1: Single crochet across for 14 stitches, chain 1, turn. Row 2: Increase in the first stitch, single crochet across to the last stitch, increase in the last stitch — 16 stitches, chain 1, turn. Repeat Row 2 until you have 24 stitches. Switch to white yarn for two rows without any increases — this creates the white rind stripe. Then switch to pink or watermelon-red yarn. Continue increasing every row at both ends for 4 more rows, then work even for 6 rows to build up the pink flesh section. Now you’ll decrease: single crochet 2 together at the beginning and end of each row until you get back down to about 10 stitches, then slip stitch across and fasten off. You now have one flat watermelon wedge shape.
Make a second identical piece. Place them together with wrong sides facing and single crochet around the entire edge using green yarn, inserting fiberfill and catnip as you go before closing up. Once it’s fully closed, use black embroidery thread to stitch small seed shapes across the pink section — a few loose straight stitches fanned out from a center point create a very convincing seed. Your watermelon slice is done and it is an absolute star.
IMAGE SUGGESTION: Cat holding the watermelon slice toy in both front paws on a bright white surface with natural summer light coming from the side. The green and pink colors pop beautifully against white or pale wood backgrounds.
4. Crochet Catnip Avocado — The Internet’s Favorite Fruit
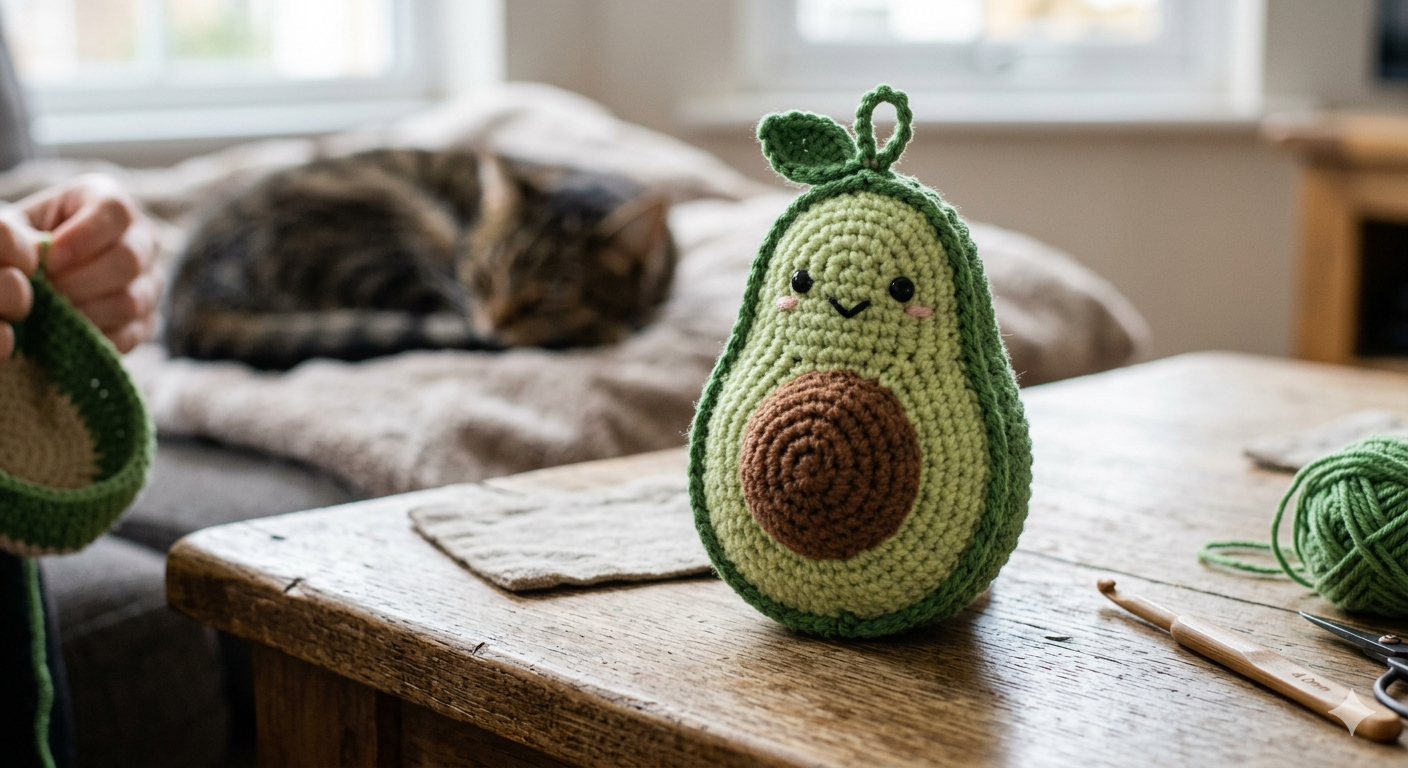
The avocado is the patron vegetable-fruit of the internet, and it has now fully entered your cat’s toy basket. A crocheted avocado stuffed with catnip is one of the most searched cat toys DIY easy ideas on Pinterest right now, and making one is more straightforward than you’d expect because it’s really just two ovals and a little brown pit.
For the avocado body, start with dark green yarn. Magic ring, 6 single crochets, pull tight. Round 2: Increase every stitch by 12. Round 3: Single crochet 1, increase, repeat around for 18. Round 4: Single crochet 2, increase, repeat for 24. Round 5: Single crochet 3, increase, repeat for 30. Rounds 6 through 12: Even single crochets all the way around, no shaping changes. Round 13: Begin decreasing by working single crochet 3, invisible decrease, repeating around for 24 stitches. Round 14: Single crochet 2, invisible decrease for 18. Stop here and switch to a lighter avocado-green or pale yellow-green yarn. Continue with Round 15: single crochet 1, invisible decrease for 12 stitches. Stuff with fiberfill and a generous amount of catnip at this point. Round 16: Invisible decrease all the way around for 6 stitches, fasten off, and sew closed.
For the pit, use brown yarn. Magic ring, 6 single crochets, increase every stitch for 12, increase alternating with single crochets for 18, then work 4 even rounds and decrease back down by doing single crochet 1 and invisible decrease alternating until closed. Stuff lightly and sew onto the center top of the avocado. If you want to split the avocado into two halves that your cat can separate and carry around independently, make two shallow bowl shapes using the same pattern up to Round 5, stuff each with catnip, and connect them loosely with a length of yarn so your cat can pop them apart. That detail alone sends this toy viral every time.
IMAGE SUGGESTION: Before-and-after image — left side shows green and brown yarn with a hook and some dried catnip; right side shows the finished avocado being cradled in someone’s palm with a cat trying to steal it.
5. Rainbow Butterfly Wand Toy — Summer in Motion
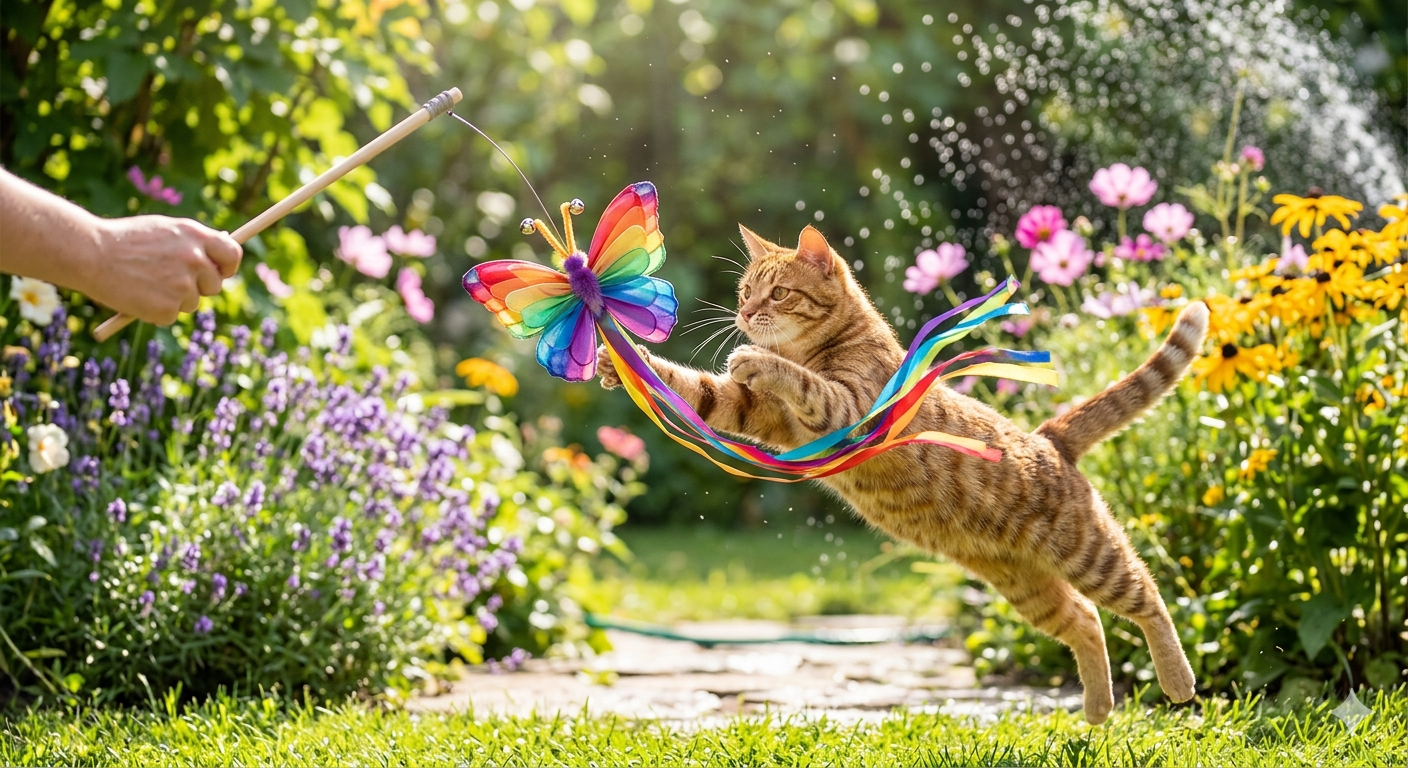
Interactive toys photograph beautifully, and they also do something the stuffed toys can’t — they turn playtime into a full event. A crocheted rainbow butterfly on a wooden wand stick is the summer cat toy DIY idea that gets shared because the play session photos are genuinely stunning. Colorful wings, a flying silhouette, a cat mid-leap — it is content that creates itself.
For the wings, you’ll make four identical pieces and then join two per side. Start with your brightest summer yarn — coral, turquoise, lemon yellow, whatever calls to you. Chain 10. Row 1: Single crochet in the second chain from the hook and in every chain across for 9 stitches, chain 1, turn. Row 2: Increase in the first stitch, single crochet to the last stitch, increase in the last 11 stitches. Rows 3 through 6: Increase at the beginning and end of each row — you should reach about 19 stitches by Row 6. Rows 7 and 8: Single crochet even with no shaping. Row 9: Decrease at the beginning and end, single crochet across the middle. Row 10: Decrease at each end again. Rows 11 through 14: Continue decreasing at each end of each row until you’re back to about 9 stitches. Slip stitch across and fasten off. Make four of these wing shapes, each in a different summer color if you want a rainbow effect. Sew two wings together along their straight center edges to form one side of the butterfly, and repeat with the other two for the other side.
For the body, chain 16 and fold it in half, then join the two halves by slip stitching along the edge to create a small tube. Stuff it lightly. Sew both wing pairs onto either side of the body. For antennae, cut two pieces of wire-core pipe cleaner if available, or simply chain 10 in a contrasting yarn, fold it in half, and twist for some stiffness, then attach to the top of the body. Tie the finished butterfly to a wooden dowel or even a sturdy chopstick with about 14 inches of string. The length of the string matters — too short, and your cat can’t really fly after it, too long, and it drags on the ground. 14 inches gives you the perfect arc of movement.
IMAGE SUGGESTION: Action shot of a cat mid-jump with one paw extended toward the butterfly. The colorful wings against a bright background make this image stop-worthy on any Pinterest feed.
6. Little Crochet Mouse With Embroidered Details
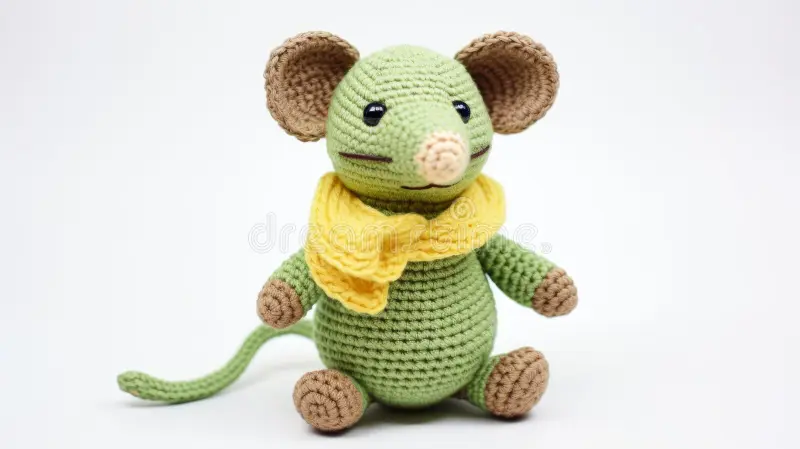
The mouse is the original cat toy, and it has earned its legendary status. Every cat, regardless of age or personality, will respond to a crocheted mouse because they are essentially hardwired to. What makes the crochet version special is the texture — the yarn gives just enough resistance and movement under a cat’s paw to trigger the full prey response, and the embroidered whiskers make it look so adorable that you’ll want to make a dozen.
Magic ring, chain 2, 6 single crochets into the ring, pull tight. Round 2: Increase every stitch for 12. Round 3: Single crochet 1, increase, repeat for 18. Round 4: Single crochet 2, increase, repeat for 24. Round 5: Single crochet 3, increase, repeat for 30. Rounds 6 through 12: Single crochet even all the way around. The body of the mouse should start looking like a small oval. Round 13: Single crochet 3, invisible decrease, repeat for 24. Round 14: Single crochet 2, invisible decrease for 18. Stuff firmly with fiberfill and a good pinch of catnip. Round 15: Single crochet 1, invisible decrease for 12. Round 16: Invisible decrease all the way around for 6. Fasten off and close.
For the ears, use a slightly lighter version of your mouse color if you have it, or use pink. Magic ring, 6 single crochets. Increase every stitch by 12. Slip stitch to join and fasten off. Make two. Fold each ear circle slightly in half to create a cupped shape and sew them onto the top of the head, one on either side. Attach two black safety eyes between Rounds 3 and 4 of the head, spaced evenly. For whiskers, thread a long piece of grey or white embroidery floss onto a yarn needle and push it through the nose area from one side to the other, leaving tails on both sides, then trim to about 1.5 inches per side. Do this twice for four whiskers total. For the tail, crochet a chain of about 15 to 20 stitches in a matching or contrasting yarn and sew it securely to the back. Your mouse is complete and honestly too cute to give away.
7. Crocheted Strawberry Toy — The Most Repinned Cat Toy of Summer
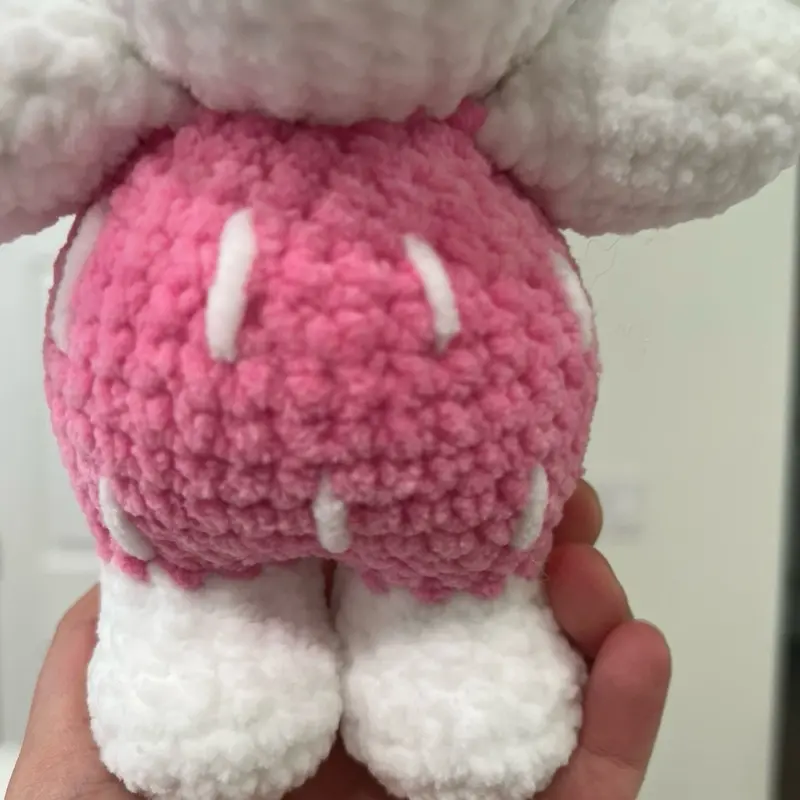
Ask any cat content creator which crochet cat toy gets saved the most during summer, and the answer is almost always the strawberry. The shape is iconic, the colors are vivid, the little yellow seed details are irresistible in photos, and cats go absolutely feral for the catnip stuffing inside. This is the cat toy DIY easy project that genuinely looks harder than it is, which means people save it, attempt it, succeed, and share their results — driving endless repins.
Magic ring, 6 single crochets, close ring. Round 2: Increase every stitch by 12. Round 3: Single crochet 1, increase alternating for 18. Round 4: Single crochet 2, increase for 24. Round 5: Single crochet 3, increase for 30. Work even rounds without shaping from Round 6 through Round 12 in red yarn. At Round 13, begin your decreases: single crochet 3, invisible decrease, repeating around for 24. Round 14: single crochet 2, invisible decrease for 18. Stuff generously with fiberfill and catnip. Round 15: single crochet 1, invisible decrease for 12. Round 16: invisible decrease all the way for 6. Fasten off and close.
For the leafy top, switch to green yarn. Magic ring, 6 single crochets. Round 2: In each stitch work the following petal sequence — chain 4, single crochet in the second chain from the hook, single crochet in the next 2 chains, slip stitch back into the base stitch. This gives you 6 small pointy leaves fanning out from the center. Fasten off and sew the leaf cluster onto the top of the strawberry body. For seeds, use yellow embroidery thread and stitch small Y-shaped marks scattered across the red body — just a few is enough to read as seeds without overloading the texture. These small details are what make the difference between a toy that looks handmade and one that looks like it belongs in a craft boutique.
IMAGE SUGGESTION: Overhead flat lay showing the strawberry toy at the center surrounded by a few fresh real strawberries, a length of red yarn, and the green leaf cluster next to it, pre-assembly. A cat stretching its paw toward the toy from the edge of the frame completes the image perfectly.
8. Crochet Bee Toy — Summer’s Most Charming Cat Toy
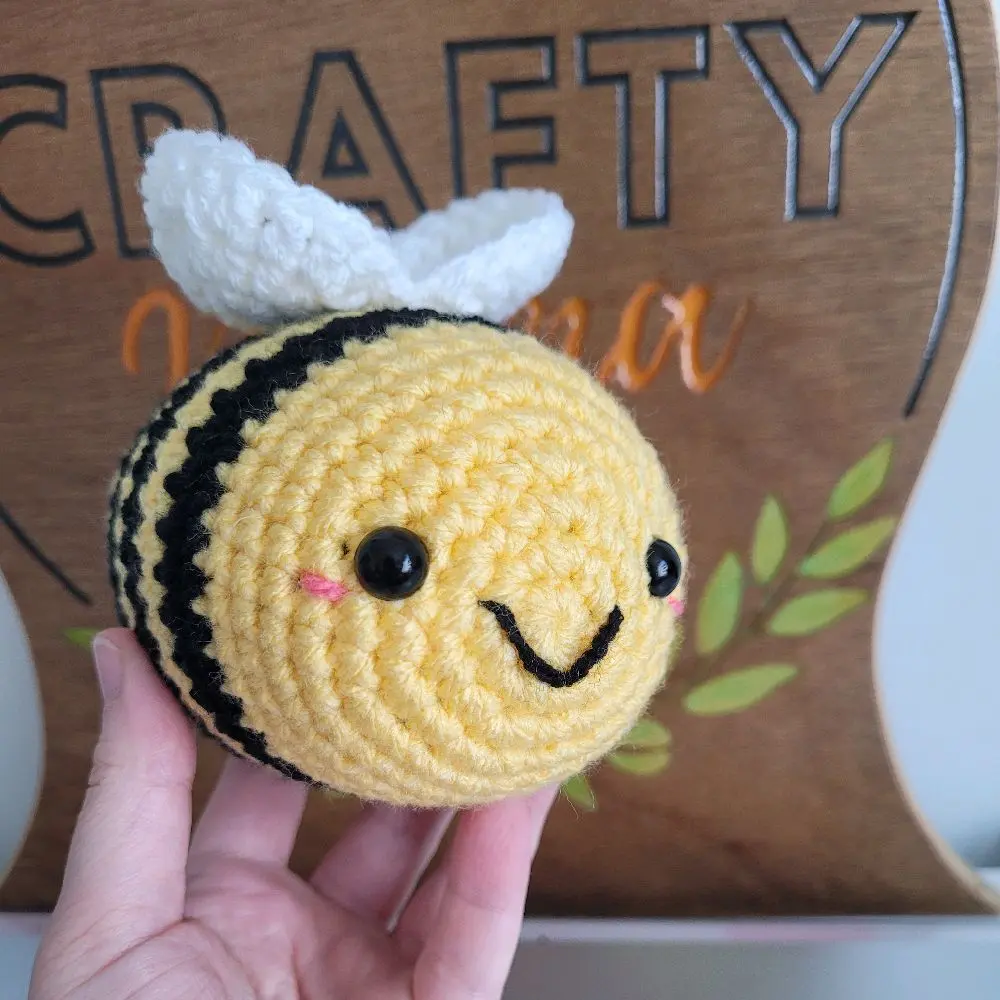
Bees are having an enormous moment in every corner of the internet this summer — home décor, fashion, garden content — and they translate into the most charming little crocheted cat toy you can imagine. Yellow and black stripes, tiny yarn wings, a little stinger tail — this toy is adorable in a basket, gorgeous in a photo, and your cat will bat it across the floor like it’s completing an important mission.
For the body, start with yellow yarn. Magic ring, 6 single crochets. Increase every stitch by 12. Single crochet 1, increase alternating for 18. Work 2 even rounds. Switch to black yarn for 2 rounds. Switch back to yellow for 2 rounds. Switch to black for 2 rounds. Switch to yellow for 1 round. This stripe pattern creates the classic bee banding down the body. Begin decreasing: single crochet 1, invisible decrease alternating for 12. Stuff with fiberfill. Invisible decrease all the way for 6, fasten off, and close. You should have a plump, striped oval shape at this point.
For the head, use yellow yarn. Magic ring, 6 single crochets. Increase every stitch by 12. Work 3 even rounds. Invisible decrease all the way for 6. Stuff lightly and sew onto the body. Add tiny black safety eyes. For wings, use white or very light grey yarn. Chain 8, single crochet in the second chain from the hook and in every chain across for 7 stitches, chain 1, turn. Increase at each end for 3 rows, reaching about 13 stitches. Work 2 even rows, then decrease at each end for 3 rows, fasten off. Make two. Sew both wings side by side onto the top of the bee’s body. For the stinger, chain 5, slip stitch back down the chain to create a small, firm cord and sew it to the back end of the body. Optional: Use black embroidery thread to add a small smile and two tiny antennae on the head for maximum charm.
9. Crochet Ice Cream Cone Toy — Summer in Toy Form
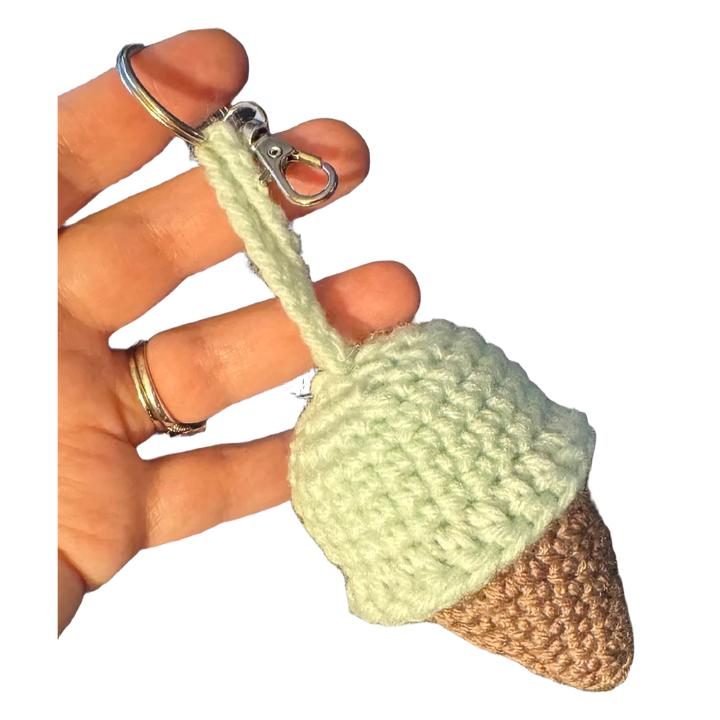
This is the toy that makes people actually say “stop it” out loud when they see the photo. A crocheted ice cream cone in pastel summer colors, stuffed with catnip, with a tiny scoop that your cat can pop off and carry around separately — it is the definition of summer cat toy DIY content, and it photographs like an absolute dream.
Start with tan or sand-colored yarn for the cone. Magic ring, 6 single crochets. Round 2: Increase every stitch by 12. Round 3: Single crochet 1, increase for 18. Round 4: Single crochet 2, increase for 24. Rounds 5 through 7: Single crochet even. Round 8: Begin decreasing — single crochet 2, invisible decrease for 18. Stuff lightly. Round 9: Single crochet 1, invisible decrease for 12. Round 10: Invisible decrease all around for 6, fasten off, and close into a cone point. Now make the waffle texture: go back to the outside of the cone with tan yarn and a slightly smaller hook, and surface slip stitch diagonal lines across the cone in both directions to create a crosshatch grid pattern. This waffle cone texture is what makes people pin this toy immediately.
For the ice cream scoop, use pink, mint, or lavender yarn — whatever reads as your favorite summer flavor. Magic ring, 6 single crochets. Increase every stitch by 12. Single crochet 1, increase for 18. Work 4 even rounds. Invisible decrease alternating with single crochets for 12. Stuff generously with fiberfill and catnip here. Invisible decrease all around for 6, close. This becomes the scoop that sits on top of the cone. You can either sew it on permanently or attach it with a loop of yarn loose enough that a determined cat can bat it off. The detachable scoop version creates a natural play pattern where the cat knocks the scoop off the cone and then carries both pieces around, which makes for absolutely unhinged and wonderful video content.
10. Crocheted Feather Cluster Wand Toy
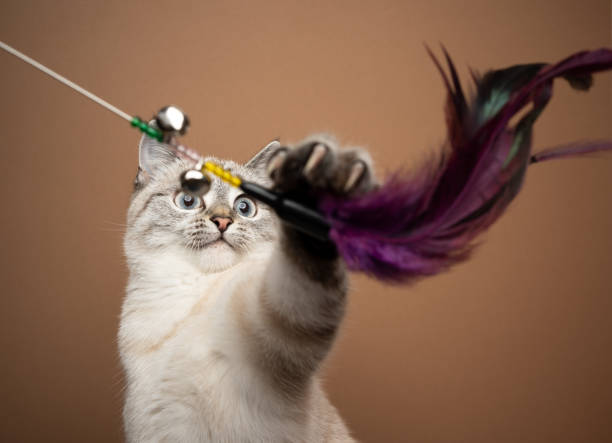
The feather wand is the toy that turns even the laziest senior cat into a kitten for ten minutes. Making the feathers out of yarn rather than real feathers gives you creative control over color — and this summer, an earth-toned feather cluster in rust, cream, and sage looks incredible and photographs like something from a high-end pet boutique.
For each feather, chain 20. Starting in the second chain from the hook, slip stitch in the next 3 chains, single crochet in the next 4, half double crochet in the next 4, double crochet in the next 4, then work back down the other side of the foundation chain: double crochet 4, half double crochet 4, single crochet 4, slip stitch 3. This creates a feather shape that widens at the center and tapers at both ends. For a more textured feather, when you work back along the second side, pick up the unused loops of the foundation chain rather than working into the same stitches. Make 6 to 8 feathers per cluster in varying lengths by adjusting your starting chain number — chain 14 for a short feather and chain 26 for a long, dramatic one.
Bundle all your feathers together at their base, wrapping the base tightly with a contrasting yarn color and securing with several knots. You can add a few strands of unworked yarn cut to different lengths and frayed slightly at the ends for a mixed texture that cats find irresistible. Tie the whole cluster to a wooden dowel with 14 to 16 inches of thin cord or waxed twine. The wooden dowel gives you a comfortable handle for extended play sessions — which your cat will demand.
IMAGE SUGGESTION: Close-up of the feather cluster fanned out on a warm wooden surface in afternoon sunlight, with the earth-tone colors showing their full richness. A cat’s face is slightly out of focus in the background, watching intently.
11. Crochet Lemon Toy — Bright, Fresh, Instantly Shareable
Lemons are the texture print of summer 2025, and they are absolutely everywhere — kitchen textiles, swimwear, stationery, and now, thanks to the cat toy DIY community, your cat’s toy basket. A crocheted lemon stuffed with crinkly material is bright, cheerful, squeezable, and photographs beautifully with almost zero effort.
Magic ring, 6 single crochets. Increase every stitch by 12. Single crochet 1, increase for 18. Single crochet 2, increase for 24. Single crochet 3, increase for 30. Work 6 even rounds of single crochet in bright lemon yellow. Then decrease: single crochet 3, invisible decrease for 24. Single crochet 2, invisible decrease for 18. Stuff with fiberfill and a small square of crinkly material at this stage — the crinkle gives a sound cue that will bring your cat running from two rooms away. Single crochet 1, invisible decrease for 12. Invisible decrease for 6. Fasten off and close.
For the signature lemon tips, cut a small tuft of yellow yarn — about 6 strands at 2 inches each — and fold them in half. Pull the folded loop through the tip of the lemon with your crochet hook and pull the ends through the loop, creating a small tassel. Trim all ends to the same short length so it looks like a neat little nub rather than a fringe. Do this on both ends of the lemon for that unmistakable lemon silhouette. Make a lime in sage green and an orange in warm coral using the same pattern, and you have a citrus set that looks stunning arranged together in photos.
IMAGE SUGGESTION: Three citrus toys — lemon, lime, orange — arranged in a triangle on a white surface with long afternoon shadows. A cat’s paw enters from the bottom corner, reaching toward the lemon.
12. Crocheted Shrimp Toy — The One That Always Goes Viral
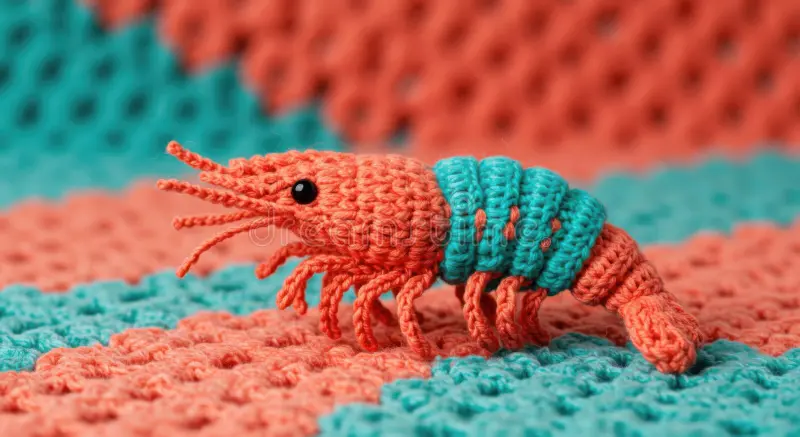
Let’s talk about the crocheted shrimp. There is something deeply funny and also weirdly satisfying about watching a cat bunny-kick a tiny crocheted shrimp for twenty minutes straight, and the internet agrees — shrimp cat toy videos go viral with a consistency that defies explanation. The curved shape is perfect for a cat’s grip, the size fits right in their paws, and the texture of the crocheted yarn triggers the full bunny-kick response almost every time.
For this toy, you will be working with a curved shape, which you achieve by strategically placing your increases and decreases on one side only, rather than evenly around. Chain 4 and join into a ring with a slip stitch. Round 1: Work 8 single crochets into the ring. Round 2: Increase in the first 4 stitches, single crochet in the last 4 — 12 stitches. This begins the curve. Round 3: Single crochet in the first 2, increase in the third, single crochet in the fourth, repeat this sequence all the way around. Round 4 through 8: Single crochet even. Round 9: Single crochet in the first stitch, increase in the second, single crochet in the third, repeat around. Round 10 through 14: Single crochet even. Round 15: Begin decreasing on one side only — invisible decrease in the first stitch, single crochet in the next 2, repeat, so the body starts to curve and taper toward the tail. Stuff firmly with fiberfill and catnip at Round 16 before closing. Round 17 and 18: Invisible decrease all the way around until 6 stitches remain, close and fasten off.
For legs, cut 8 short lengths of pink or coral yarn about 1 inch each and attach them in pairs along the underside of the shrimp using your crochet hook — fold each length in half, pull the loop through a stitch, pull the ends through the loop, tighten. They don’t need to be perfect because your cat will chew them off within minutes. Use pink, coral, or orange yarn for the shrimp body — the color makes it recognizable immediately in photos and adds to the summer seafood aesthetic that has made this toy so shareable.
13. Crocheted Ball Set in Summer Colors — Simple, Effective, Wildly Popular
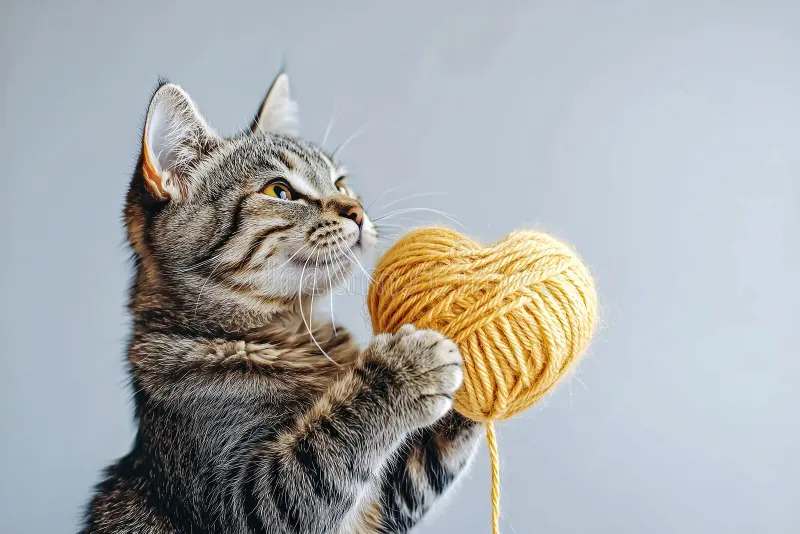
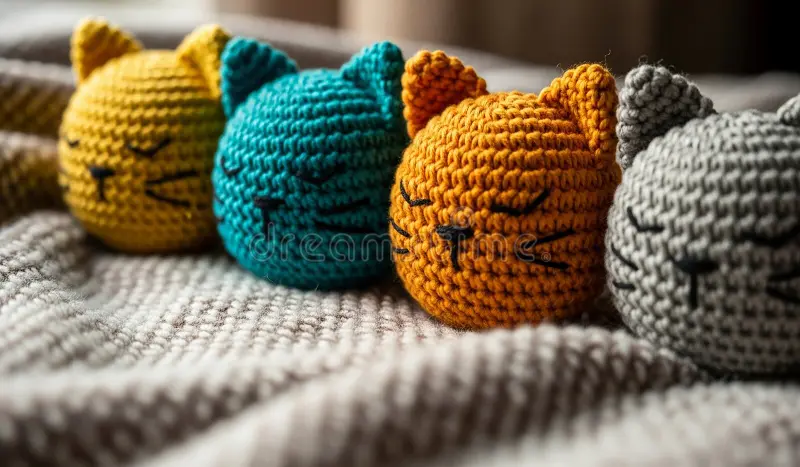
Sometimes the toy that gets the most playtime is the simplest one, and the crocheted ball is proof of that. A set of small balls in summer colors — coral, turquoise, lemon yellow, mint green — made in slightly different textures so your cat gets variety, is one of the most consistently repinned cat toy DIY easy ideas on Pinterest. They’re fast to make, beautiful to photograph, and genuinely excellent cat toys because they’re lightweight enough to bat around easily but have enough texture that cats actually grab and grip them.
For a smooth ball, a magic ring, 6 single crochets. Increase every stitch by 12. Single crochet 1, increase for 18. Work 4 even rounds. Single crochet 1, invisible decrease for 12. Stuff firmly. Invisible decrease for 6. Close. For a loop-textured ball, work the same pattern, but for every other stitch in the middle rounds, work a loop stitch: insert your hook into the stitch, wrap the yarn around your finger to create a loop, and pull both strands through the stitch before completing the single crochet normally. This creates a fluffy, loopy surface that cats love to dig their claws into lightly. For a bobble-textured ball, substitute bobble stitches — 5 double crochets in the same stitch pulled together — scattered through the even rounds for a bumpy, grippable surface.
Make at least 4 balls per set and arrange them for photos in a gradient from lightest to darkest color. The gradient arrangement is a Pinterest visual trick that gets significantly more saves than a random arrangement because it photographs as intentional and aesthetic rather than just a pile of yarn balls.
14. Crocheted Pumpkin Toy — Pin It Now While Summer Traffic Is Hot
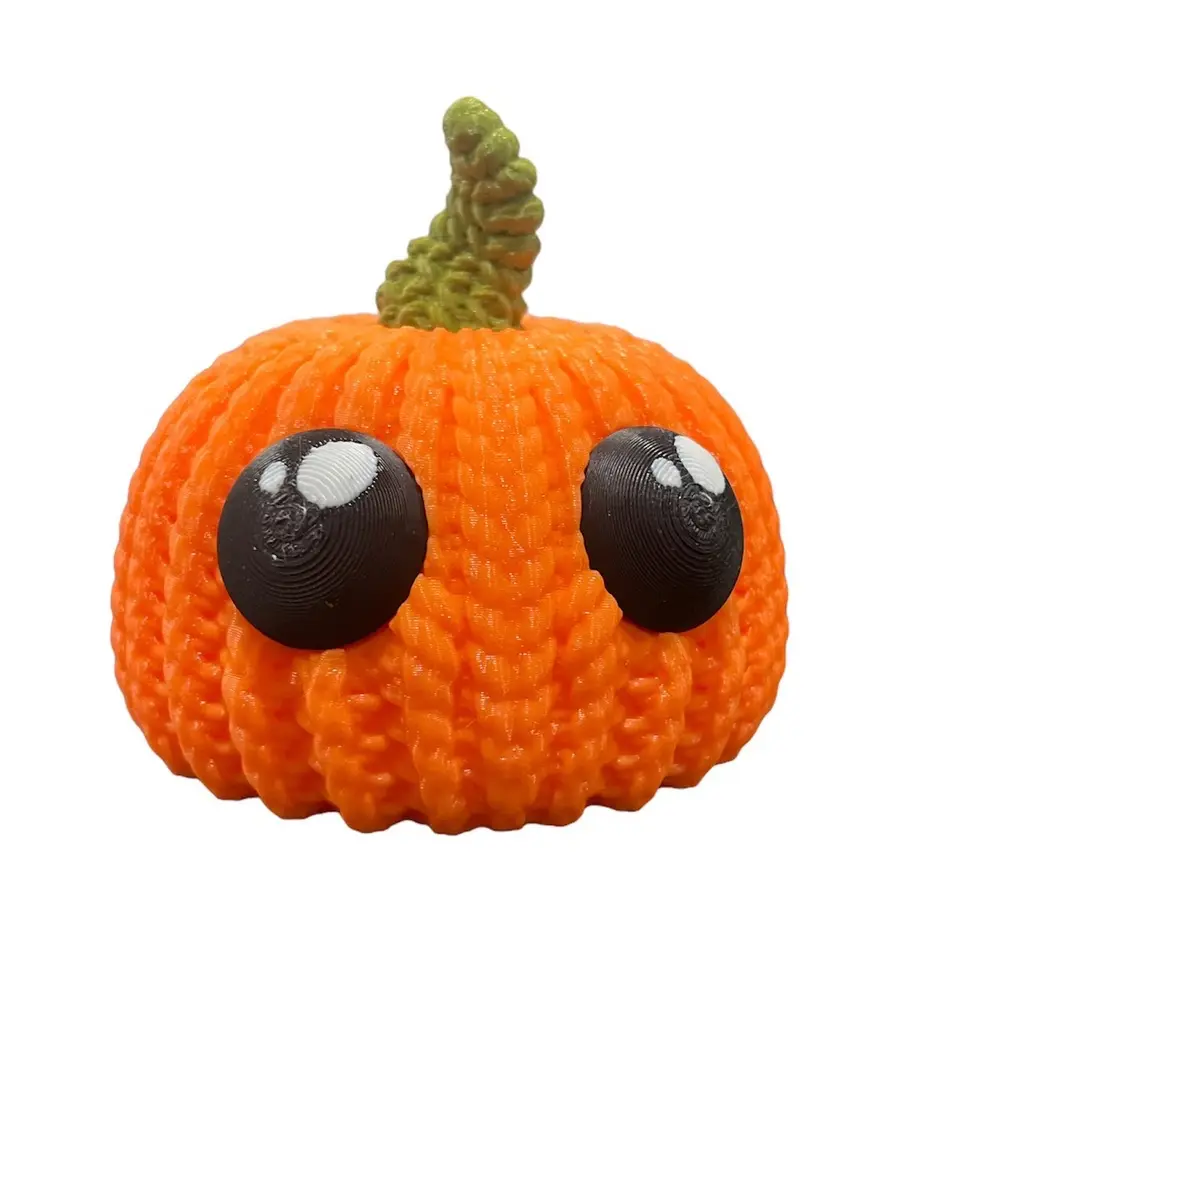
This one requires a small Pinterest strategy explanation because it is genuinely useful knowledge for any cat content creator. Summer is the season when fall content starts gaining momentum on Pinterest, because pinners plan and save seasonally ahead of time. A crocheted pumpkin cat toy pinned in late summer rides the early wave of fall planning traffic and continues accumulating saves all the way through November. You build the pin now when your board is getting summer attention, and it works for you for months. It is also one of the easiest crochet cat toys to make because it is essentially a round ball with a ribbed texture and a stem.
For the pumpkin body, use orange yarn. Magic ring, 6 single crochets. Increase every stitch by 12. Single crochet 1, increase for 18. Single crochet 2, increase for 24. Single crochet 3, increase for 30. Work 6 even rounds. Decrease: single crochet 3, invisible decrease for 24. Single crochet 2, invisible decrease for 18. Stuff with fiberfill and catnip. Single crochet 1, invisible decrease for 12. Invisible decrease for 6. Close. Now for the ribbed pumpkin look: thread an orange yarn needle and push it through the center bottom of the pumpkin straight through to the center top, pulling it firmly to create a slight indent. Bring it back down the outside and through the center again, rotating a bit each time, until you have 6 rib indentations evenly spaced around the pumpkin. Each pass tightens the rib slightly and gives it that unmistakable pumpkin silhouette.
For the stem, switch to brown or dark green yarn. Chain 5. Single crochet in the second chain from the hook and in each chain across for 4 stitches. Slip stitch the two short edges together to form a small tube and sew it firmly onto the top center of the pumpkin. For a small leaf, chain 8, single crochet in the second chain from the hook, half double crochet in the next, double crochet in the next 2, half double crochet, single crochet, then 3 single crochets in the last chain to turn the corner, and work back along the underside of the chain in the same sequence. Sew the leaf base onto the stem and let it curl naturally.
15. The Full Summer Toy Basket — Make All 15 and Display Them Together
This is the project that transforms everything. Once you’ve made a selection of the toys above, the final move is to arrange them in a small wicker or cotton rope basket and photograph them as a collection. This is not just a display idea — it is a Pinterest strategy. A single image showing eight or ten different crochet cat toys arranged in a beautiful summer basket tells viewers that this one pin contains an entire rabbit hole of ideas, and that perception drives saves more powerfully than any single toy photo. People save the basket image and then follow the board to find each individual toy, and that is how one article turns into a long-term traffic source.
For the basket display, arrange your toys with the most colorful and visually complex ones — the sushi set, the strawberry, the bee, the butterfly — placed toward the back and center where they read as a backdrop. Put rounder toys like the lemon, avocado, and pumpkin toward the front where their shapes are clear. Let the mouse tail and the wand stick extend over the edge of the basket naturally — these lines create visual movement that makes the photo feel alive rather than staged. Use a surface that complements the yarn colors: light pine wood, white-washed boards, or a pale linen cloth all work beautifully. Natural side-lighting from a window is worth waiting for — it creates depth and shadows that no ring light can replicate.
Your cat will inevitably attempt to climb into the basket during the photo session, knock half the toys onto the floor, and then sit in the empty basket looking extremely pleased with themselves. Photograph that too. It will get more engagement than the styled shot.
IMAGE SUGGESTION: Overhead shot of the full wicker basket with all the toys arranged inside, warm natural light from the side, and a cat’s tail curling into the bottom corner of the frame.
ENDING
You just learned how to make fifteen crochet cat toys from scratch, and your cat has been watching you read this the entire time with absolutely zero patience left. It’s time. Pick one toy — the fish if you want fast results, the strawberry if you want something stunning, the shrimp if you want chaos — grab your yarn, and make your cat’s entire summer. These cat toy DIY projects don’t require expensive materials, fancy skills, or a lot of time. They just require a little yarn, a little love, and the understanding that your cat will drag the finished toy under the couch within the first six minutes, which means you did everything right.
If you make any of these, please share them on Pinterest. The cat-crafting community on Pinterest is one of the most warm, generous, and enthusiastic corners of the internet, and your version of the strawberry or the avocado or the shrimp might be exactly the photo that inspires another cat parent to pick up their hook for the first time. Tag your pins and save this article to your DIY board so you can come back for the next toy on your list. The yarn isn’t going to crochet itself, and your cat isn’t getting any less bored.